
Nail art has become increasingly popular over the years, with people looking for unique and creative ways to express themselves through their nails.
One of the trendiest nail art techniques that has gained momentum is nail wrapping. Nail wrapping offers a convenient and stylish way to achieve salon-quality nail art without the need for drying time or salon visits. In this blog, we will explore the world of nail wrapping, from what it is and why it’s gaining popularity to the essentials for nail wrapping and expert tips for application.
Whether you’re a nail art enthusiast or looking for a quick and easy way to spice up your nails, nail wrapping may be the perfect nail art technique.
- Nail Wrapping: An Overview
- The Essentials for Nail Wrapping
- Preparing Your Nails for Wrapping
- Starting the Nail Wrapping Process
- Ensuring Impressive Results with Nail Wraps
- Maintaining Your Nail Wraps for Longevity
- Advantages of Nail Wraps over Traditional Nail Polish
- Common Mistakes to Avoid while Applying Nail Wraps
- Personal Experience: Ashley Rebecca's Nail Wrapping Journey
- Expert Insights: Elina Ogawa on Nail Wrapping
- Do Nail Wraps Damage Your Natural Nails?
- Frequently Asked Questions
- Conclusion
Nail Wrapping: An Overview
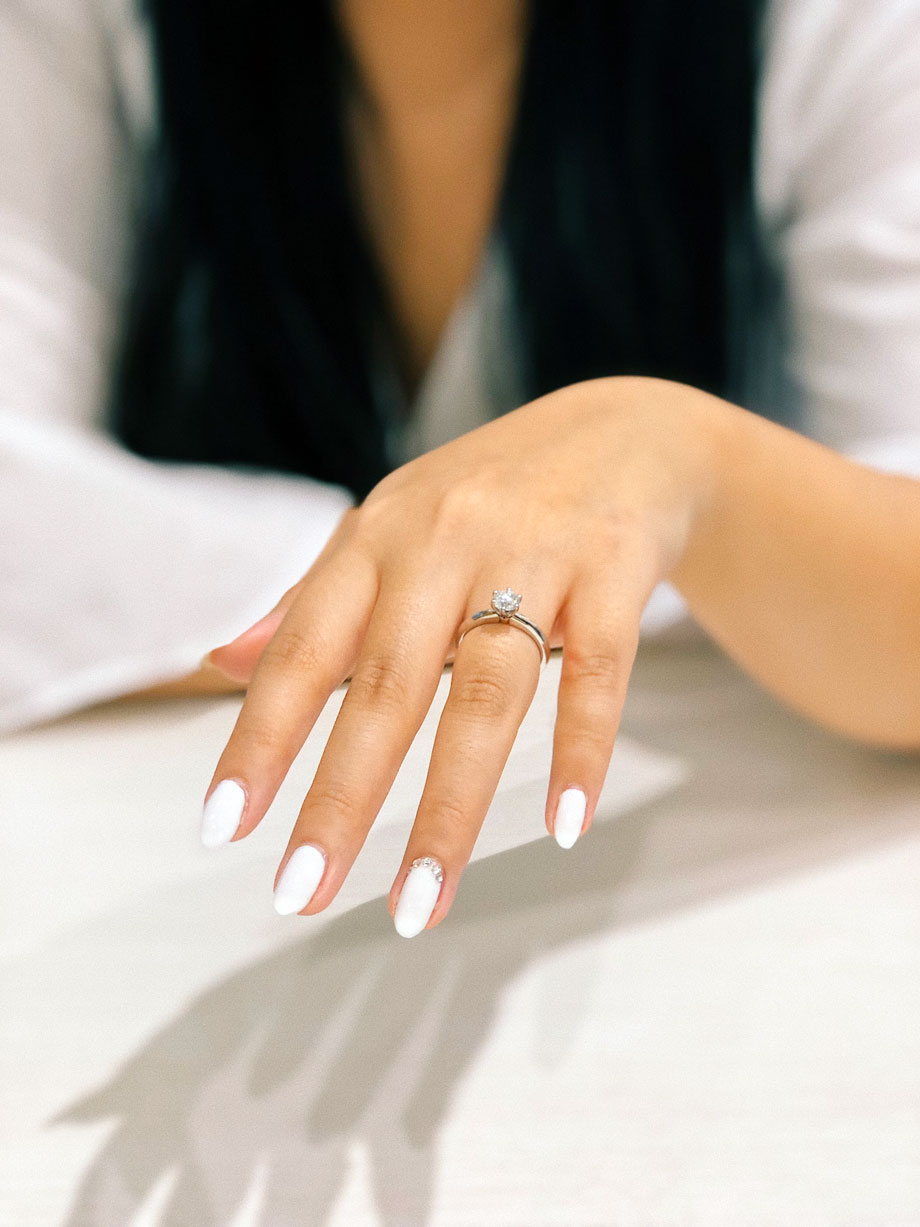
Nail wrapping is a nail art technique that involves applying adhesive stickers, known as nail wraps, onto the nails for unique designs and colors. These wraps are available in various patterns, ranging from seasonal prints to zodiac-themed designs, allowing individuals to express their style and personality.
Nail wraps can be made of vinyl or gel, with gel wraps offering a glossy, salon-like finish. They are quick and easy to apply, and the wrap is trimmed and filed for a perfect fit on each nail.
What are Nail Wraps?
Nail wraps, or nail stickers, are adhesive stickers explicitly designed for nails. They are a popular alternative to traditional nail polish, offering unique patterns and colors that can instantly transform the look of your nails. Nail wraps come in various brands, each with multiple designs and styles to suit different preferences. Some popular brands for nail wraps include Color Street, Jamberry, and Dashing Diva.
Nail wraps are easy to apply, requiring them to be peeled off and pressed onto the nail bed. They can be trimmed, filed, and shaped for a perfect fit, offering a salon-quality nail art look without drying time.
Why Nail Wraps are Gaining Popularity
Nail wraps have gained popularity for several reasons. First, they offer a convenient and time-saving way to achieve salon-quality nail art at home. With nail wraps, there is no need to wait for nail polish to dry, making it a quick and easy option for those who are always on the go.
Additionally, nail wraps come in various designs, from chic and trendy to fun and playful, allowing individuals to easily switch up their nail art to suit any occasion or mood. Furthermore, nail wraps are available in both regular vinyl and gel options, with gel wraps providing a glossy, long-lasting finish.
Silk nail wrapping, which uses silk wraps instead of adhesive stickers, is another popular option for those looking for a more natural and durable nail art solution.
The Essentials for Nail Wrapping
When it comes to nail wrapping, having the right tools and materials is essential for a successful application. To assemble your nail wrap kit, you will need the following items: base coat, top coat, nail file, cuticle pusher, wooden stick, prep pad, and, of course, quality nail wraps.
The base coat helps create a smooth base for the nail wraps, while the top coat adds shine and durability. A nail file is necessary for shaping and smoothing the nails, and a cuticle pusher helps push back and tidy up the cuticles. A wooden stick can be used for precise application, and a prep pad is helpful for cleaning the nails before application.
Quality nail wraps ensure a smooth and long-lasting application, so choosing reputable brands is essential.
Assembling Your Nail Wrap Kit
Assembling your nail wrap kit is easy when you have all the essentials in place. Start with a base coat, which acts as a primer for the nail wraps, ensuring better adhesion and longevity.
Apply a thin layer of base coat to each nail and let it dry completely before moving on to the next steps. Next, you will need quality nail wraps in your desired design or color. Choose wraps that suit your style and mood, whether it’s a solid color, a floral pattern, or a geometric design. A top coat is also essential to seal the nail wraps and provide a glossy finish. Apply a thin layer of top coat over the nail wraps, covering the entire nail surface for maximum durability. Make sure to let the top coat dry completely before touching anything to avoid smudging.
To prepare your nails for wrapping, start by shaping them to your desired length and shape using a nail file. Be gentle and file in one direction to avoid weakening the nails. Once your nails are shaped, it’s time to clean them. Use a prep pad to remove any oils or debris from the nail surface, ensuring better adhesion for the nail wraps. Please pay attention to the cuticle area and ensure it’s clean and dry.
Importance of Quality Nail Wraps
Investing in quality nail wraps is essential for a successful nail wrapping experience. While cheaper options may be available, quality nail wraps offer several benefits.
Firstly, they ensure a smooth and easy application, adhering well to the nails without wrinkling or peeling. This results in a professional and salon-like finish.
Secondly, quality nail wraps tend to last longer, providing weeks of wear without chipping or fading. They are more resistant to everyday wear and tear, making them a durable option for those with an active lifestyle.
Lastly, quality nail wraps often come in a wide range of designs, colors, and patterns, allowing you to express your unique style and creativity.
Expert Recommended: Color Street Nail Wrap Kit
When it comes to quality and variety, one brand that stands out for nail wraps is Color Street. Color Street offers a range of nail polish strips in various designs, colors, and finishes. Their nail wrap kit includes salon-quality, real gel nail wraps for a perfect fit and unique design. Applying Color Street nail wraps is easy, with no heat required for an ultra-shine gel finish.
The wraps can be easily applied, trimmed, and filed for a customized fit. Color Street nail wraps cater to different nail art styles, preferences, and occasions with a wide array of fun designs, from solid colors to intricate patterns. The Color Street nail wrap kit is highly recommended for those looking for salon-quality nail art in the comfort of their homes.
Preparing Your Nails for Wrapping
Preparing your nails properly for optimal application and longevity is crucial before applying nail wraps. Nail preparation involves cleaning, shaping, and hydrating your nails and cuticles. By following the necessary steps, you can ensure a flawless and long-lasting nail wrap application. In the following sections, we will delve into the significance of nail preparation, the steps to clean and shape your nails, and the role of cuticle oil in hydrating your cuticles for a salon-worthy nail wrapping experience.
The Significance of Nail Preparation
Proper nail preparation is critical to achieving a salon-quality, professional finish with nail wraps. This step ensures that your nails are free of oils, debris, and rough edges, providing a smooth surface for the wraps to adhere to. Nail preparation also helps to remove any existing polish, residue, or dirt, allowing for better adhesion of the base coat, nail wraps, and top coat. Neglecting nail preparation can result in uneven application, premature lifting of the wraps, or less-than-desirable nail wrap results.
Whether you are new to nail wrapping or an experienced enthusiast, understanding the importance of nail prep and following the correct steps will help you achieve impressive and long-lasting nail wraps.
Steps to Clean and Shape Your Nails
Cleaning and shaping your nails are essential steps in nail preparation for wrapping. Start by removing any existing nail polish using nail polish remover or acetone, ensuring your nails are clean and residue-free. If you already have bare nails, skip this step.
Next, use a nail file to shape your nails to your desired shape and length. Whether you prefer a square, oval, almond, or coffin shape, file the nails gently, always moving in one direction to avoid weakening or damaging them. Take care to file each nail evenly, creating a uniform shape.
After shaping your nails, use a prep pad or alcohol wipe to clean the nail bed, removing excess oils, dirt, or debris. This step is crucial for ensuring better base coat and nail wrap adhesion. Make sure the nails are dehydrated before proceeding to the next steps of nail wrapping.
Hydrating Your Cuticles: The Role of Cuticle Oil
Hydrating your cuticles is essential in nail preparation, as it promotes healthy nail growth and prevents dry, cracked cuticles. Cuticle oil is specifically designed to moisturize and nourish the cuticles, keeping them soft and supple. Applying cuticle oil regularly can also help prevent hangnails and improve the overall appearance of your nails.
To hydrate your cuticles, apply a small amount of oil to each cuticle, massaging it gently. Allow the oil to soak in for a few minutes, then gently push back the cuticles using a cuticle pusher or wooden stick. Be careful not to make it too hard, as this can cause damage to the nail bed. Hydrated cuticles will result in a clean and professional-looking nail wrap application.
Starting the Nail Wrapping Process
Now that your nails are properly prepared, it’s time to dive into the exciting world of nail wrapping. Whether you’re a beginner or an experienced nail art enthusiast, the following sections will guide you through the application process, providing helpful tips and tricks for achieving impressively wrapped nails. From finding the right size for each nail to expert tips on applying the wraps, we will cover all the essential steps for a flawless nail wrapping experience.
Finding the Right Size for Each Nail
When it comes to nail wraps, one size does not fit all. Each nail wrap should be carefully measured and trimmed to fit your nails’ specific size and shape. Start by selecting a wrap that closely matches the width of your nail bed. Next, place the wrap over your nail, ensuring that it extends slightly beyond the cuticle area without touching the skin. Using a nail file, gently trim the wrap to the desired length, taking care not to file too close to the nail edge. Repeat this process for each nail, ensuring a perfect fit for every wrap.
Expert Tips on Applying the Wraps
Achieving a flawless application of nail wraps requires some expert tips and techniques. Here are some helpful tips to ensure a smooth and successful application:
- Start by applying the wrap to the center of the nail bed, laying it flat, and working from the cuticle area towards the nail tip.
- Use a wooden stick or cuticle pusher to gently press and smooth out the wrap, ensuring it adheres well to the nail.
- For curved nails, wrap one side of the nail first, then cover the other side, overlapping slightly at the center for a secure fit.
- Use a nail file to remove excess wrap for a clean and precise fit if necessary.
- Avoid touching the adhesive side of the wrap with your fingers, as oils from your skin can affect its adhesion.
Trimming and Filing for a Clean Shape
Once the wraps are applied, it’s time to trim and file them for a clean and polished finish. Here are some tips for trimming and filing nail wraps:
- Use a nail clipper or scissors to trim any excess wrap extending beyond the nail edge.
- To ensure a clean shape, file the wrapped nail using a nail file, embracing your desired nail shape. Gently file in one direction, avoiding harsh, back-and-forth filing motions.
- Focus on the tip of the nail to create a smooth and even shape, removing any rough edges or excess wrap.
- Do not file too aggressively, as this can weaken the wrap and potentially damage your nail bed.
- Aim for a clean and well-shaped nail, free of any rough or jagged edges.
Ensuring Impressive Results with Nail Wraps
Now that you’ve applied and trimmed the nail wraps, it’s time to ensure impressive results with some additional tips and techniques. Paying attention to details, such as gentle handling of nail edges, avoiding excessive filing, and keeping the wrap close to the cuticle, can make a significant difference in the final outcome of your nail wraps. By following these expert recommendations, you can achieve salon-like nails that will impress everyone around you.
Gentle Handling of Nail Edges
Handling them gently, especially around the nail edges, is essential when working with nail wraps. Applying too much pressure or tugging on the wrap can cause it to lift or peel prematurely. To avoid this, follow these tips for gentle handling of nail edges:
- Use a wooden stick or cuticle pusher to smooth the wrap and ensure it adheres properly to the entire nail surface.
- Be careful when filing or shaping the nail wrap, as excessive force can cause damage or lifting of the wrap from the nail bed.
- If you notice any areas where the wrap is not fully adhered, gently push it down using a wooden stick or your fingertip, being careful not to damage the wrap or the surrounding nail polish.
Avoiding Excessive Filing
While it’s important to shape and file your nails for a clean and polished look, it’s equally important to avoid excessive filing, as this can weaken the nail wrap material and affect its longevity. Here are some tips to avoid excessive filing:
- When filing your nails, gently touch and file in one direction for a smooth and clean shape.
- Avoid filing too aggressively, as this can cause the wrap to weaken or even come off prematurely.
- Check the nail wraps for rough edges before filing; these can be smoothed out without excessive filing.
- When filing, ensure that you shape the nail wrap evenly without removing too much material.
- Aim for a balanced and well-shaped nail, free of any sharp or jagged edges.
Keeping the Wrap Close to the Cuticle
Position the nail wrap close to the cuticle to achieve a natural and seamless look, ensuring a small gap between the nail wrap and the cuticle for a secure fit. Smooth out the nail wrap from the cuticle towards the nail tip while avoiding trapping air or moisture near the cuticle area. Paying attention to the cuticle line is crucial for a professional and well-applied nail wrap.
Maintaining Your Nail Wraps for Longevity
Consider applying a topcoat for added protection to maintain the longevity of your nail wraps. Use a gentle touch when filing or shaping your nails to prevent wrap damage. Keep your cuticles hydrated with jojoba oil or vitamin E to extend the life of your nail wraps. Additionally, apply a fresh topcoat every few days to prevent chipping and ensure a long-lasting manicure.
The Importance of Nail Care
Proper nail maintenance is crucial for ensuring their health and strength. This involves regular cleaning, trimming, and moisturizing to prevent damage and infections. Healthy nails enhance the overall appearance of the hands and play a significant role in maintaining hand hygiene. Protecting nails from harsh chemicals and trauma is essential for their well-being.
Expert Advice on Prolonging the Wear Time
To extend the wear time of nail wraps, consider using a top coat for silk nail wrapping and applying base coat gel wraps. Proper application techniques and following the correct drying time for gel nail wraps are crucial for longevity. Moreover, using a nail file to apply nail wrap gel ensures durability by creating smooth edges. These steps can significantly increase the wear time of your nail wraps, allowing you to enjoy your dashing diva or Olive & June’s nail wraps for a more extended period.
Exploring Gel Wraps for Longer-lasting Results
Gel nail wraps offer extended wear time with their durable and resilient nail art solution for longer-lasting results. The UV lamp curing process ensures resistance to chipping and everyday wear, providing long-lasting shine and color retention. Additionally, they allow for unique designs and fun seasonal nail art options, making them a popular choice among nail art enthusiasts.
Advantages of Nail Wraps over Traditional Nail Polish
Nail wraps, such as Dashing Diva or Olive & June, offer several advantages over traditional nail polish. These advantages include easy application, no dry time, and long-lasting wear. Additionally, brands like Color Street Nail Polish Strips and Scratch Nail Wraps provide a wide range of designs, allowing for various nail art options without needing a professional nail artist. Furthermore, nail wraps often come in sets with base coat nail art and top coat, providing a complete nail care solution.
Mimicking a Professional Manicure at Home
Mimic is a professional salon appearance with nail art stickers for an intricate design. Achieve a high-end gel glow with gel nail wraps. Get the effect of a pedicure at home with nail wraps for toes. Create a flawless natural nail bed with fiberglass wraps. Embrace elegant French tips using gel nail wraps.
A Convenient Option for Travelling
Say goodbye to the hassle of packing multiple nail polishes for your travels. Nail wraps offer a convenient, travel-friendly nail art solution, especially with holiday, seasonal, and fun designs. Whether it’s Halloween, Christmas, Disney themes, or zodiac signs, nail wraps have covered you for unique vacation nail art looks. The best part? They occupy minimal space in your luggage, leaving you more room for those vacation essentials. So why not take advantage of this easy, mess-free option for stunning nails on the go?
Saving Time with Nail Wraps
When it comes to saving time in your beauty routine, gel nail stickers offer quick and easy application for trendy nail art. Nail wrap polish strips and gel nail strips provide mess-free options for rapid nail art. Additionally, nail wraps fiberglass and nail wraps for toes are great time-savers, reducing the need for frequent salon visits. You can achieve salon-quality nail art quickly with nail wrap stickers and gel nail wrap cuticle pushers. For festive occasions, nail wraps for Christmas and nail wraps for toes offer time-saving, stylish nail art options.
Common Mistakes to Avoid while Applying Nail Wraps
When applying nail wraps, there are common mistakes to avoid. Ensure proper application, starting with dry nails and avoiding air bubbles. Trimming the wrap to fit each nail properly and applying heat for adhesion is essential. Additionally, avoiding quick movements and using a base coat nail art set will enhance the durability of the wraps. Remember to apply pressure to seal the wrap and finish with a top coat for longevity.
Avoiding Bubbles or Creases
To achieve flawless nail wrapping, ensure the nails are clean and free from oils or lotions. When applying the wrap, use a gentle touch to prevent creases or bubbles. Smooth out the wrap carefully to eliminate any air pockets. Additionally, using a base coat nail art set can provide a smooth surface for the wrap. Properly sealed edges and adherence to the natural nail shape can also help prevent creasing. Finally, applying heat and pressure to the wrap can enhance adhesion and eliminate bubbles.
Over-filing the Edges
When filing your nail wraps, avoid over-filing the edges to maintain the integrity of the wrap. Be cautious not to file excessively and risk damaging the wrap or your natural nail underneath. Pay attention to the edges to prevent over-filing, which can compromise the effectiveness and longevity of the nail wrap.
Personal Experience: Ashley Rebecca’s Nail Wrapping Journey
Ashley Rebecca’s fascination with nail art began with a dashing diva and evolved with olive & june manicures. She found her go-to for nail wraps at Nails of LA. Inspired by nail artist Nina Park, she experimented with scratch nail wraps and color street nail polish strips. Her collection expanded to include the gloss ultra-shine gel palette from Dashing Diva. With her expertise, she recommends the base coat nail art set for beginners. Her journey now includes sharing tips for a perfect gel mani and reducing dry time.
The Learning Process
Embracing the learning curve of nail wrapping allows for the mastery of unique designs and stunning nail art. Perfect application may require some practice, but the step-by-step process unveils creativity and beautifully wrapped nails. Discovering the art of nail wrapping opens doors to dashing diva gloss ultra-shine gel palettes and scratch nail wraps, enhancing the nail artist’s toolkit. Embrace the journey confidently, knowing that each application brings new skills and techniques, moving beyond bare nails to showcase color street nail polish strips and olive & june designs.
The Final Result: Impressively Wrapped Nails
Impressively wrapped nails from nail wrapping techniques result in flawless, professional-looking manicures that rival salon-quality nails. The chip-resistant nail art solution ensures long-lasting, stunning nails with vibrant colors and unique designs, creating an eye-catching finish. With a dashing diva gloss ultra-shine gel palette or scratch nail wraps, achieving the look of a gel mani is affordable and effortless. Whether using Olive & June, Color Street nail polish strips, or Nail Artist Nina Park’s creations, bare nails transform into works of art.
Expert Insights: Elina Ogawa on Nail Wrapping
Elina Ogawa, a nail artist at Olive & June in New York, shares her expertise in nail wrapping. She recommends using a dashing diva gloss ultra-shine gel palette for a professional finish. Elina also suggests Scratch nail wraps for easy application and long-lasting wear. She says incorporating base coat nail art sets or color street nail polish strips can elevate the nail wrapping experience. With her insights, achieving salon-worthy nails at home becomes effortless.
Tips for First-time Users
Mastering the art of nail wrapping can be an exciting journey for beginners. For a smooth application, consider essential beginner-friendly tips to unlock the secrets of nail wrapping. Navigate this world with expert guidance and helpful insights to ensure a dashing diva look every time. Whether trying out Scratch nail wraps or experimenting with Nail Artist Nina Park’s designs, these tips will help you confidently embrace this trendy nail art technique.
Nail Wrapping vs. Traditional Manicure
Embracing the versatility of nail wrapping offers a convenient, time-saving alternative to traditional manicures. The dashing diva gloss ultra shine gel palette and olive & June nail polish strips present a modern, innovative approach to nail art over conventional manicures. Discover the unique benefits of free shipping and the sale price of scratch nail wraps compared to traditional manicures. With nail artist Nina Park’s expertise, explore the differences in dry time and the transformation of bare nails with colored street nail polish strips.
Do Nail Wraps Damage Your Natural Nails?
Nail wraps provide a protective barrier and added strength, safeguarding natural nails. They are a non-damaging alternative for nail art enthusiasts, promoting healthy nails while enjoying the beauty of nail wraps.
Frequently Asked Questions
How long does nail wrap last?
Nail wraps can maintain their trendy look for up to two weeks or even longer if you take proper care of them. The duration of nail wrap longevity varies based on factors like the brand, application method, and everyday wear and tear. Avoid excessive water exposure and protect your hands with gloves during household chores to extend their lifespan. When removing the wraps, gently peel them off from the cuticle area to prevent any damage to your nails.
What are the benefits of wrapping your nails?
Experience more robust, healthier nails with nail wrapping. This technique reinforces weak or damaged nails, preventing breakage and promoting growth. Unlike acrylic or gel nails, nail wrapping uses non-toxic materials for a safer option. Plus, it provides a smooth surface for flawless polish application.
Are nail wraps healthy for nails?
Nail wraps offer a healthier alternative to traditional nail polish. They don’t require harsh chemicals or UV light to cure. However, it’s essential to be cautious as some wraps may contain adhesives that can damage the nail bed if not applied and removed properly. Follow instructions and avoid leaving them on for too long.
How do nail stickers work?
Nail stickers are a popular choice for achieving stunning nail art designs. These pre-designed adhesive designs are easy to use – peel off the backing and stick them onto your nails. Some may require an additional topcoat for longevity. Nail stickers offer a quick and hassle-free way to create intricate and unique nail looks.
Read also: Blush Nail Perfection: Tips For Gorgeous, On-trend Nails
Conclusion
In conclusion, nail wrapping is a trendy and convenient nail art technique that offers impressive results without the hassle of traditional nail polish. With nail wraps, you can achieve a professional manicure look right at home, saving both time and money. The process involves proper nail preparation, including cleaning, shaping, and hydrating the cuticles. It is essential to handle the wraps gently, avoiding excessive filing and keeping them close to the cuticles for a clean and long-lasting finish.
Nail wraps offer advantages such as mimicking a professional manicure, being a convenient option for traveling, and saving time. While there may be common mistakes to avoid, like bubbles or over-filing the edges, you can achieve beautifully wrapped nails with practice. Nail wraps do not damage natural nails when applied and removed correctly.
Depending on the quality and care, they can last significantly. Overall, nail wraps are a stylish and healthy option for nail art enthusiasts.
Featured image source: Unsplash.com


