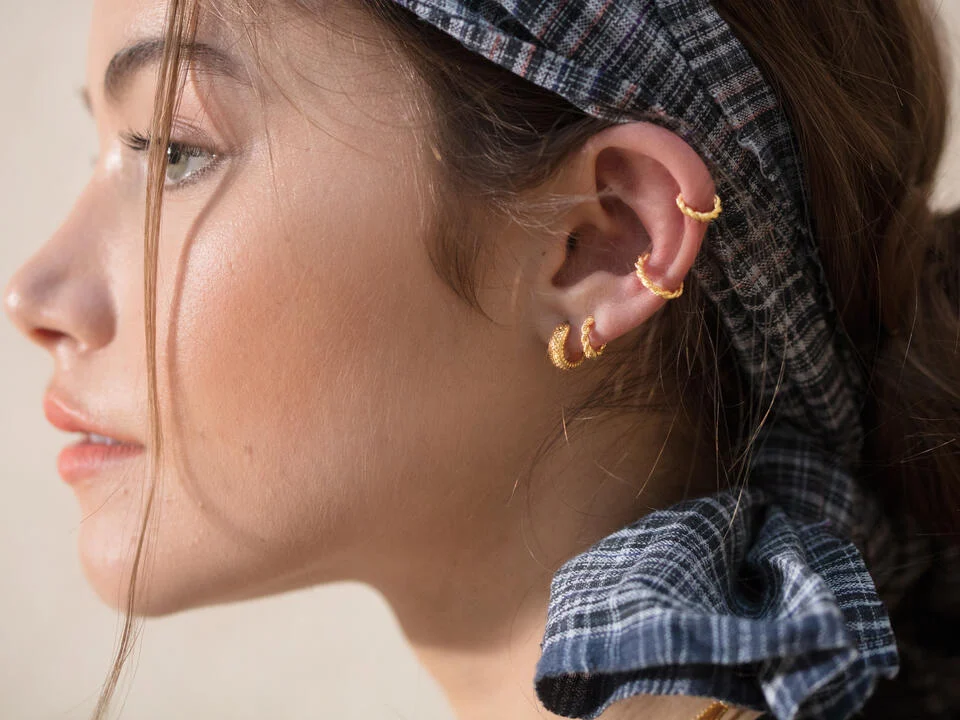
Are you interested in making your ears sparkle? Did you know that you can decorate more than just your lobes?
When people think of ear piercings styles, they tend to think of lobes and nothing more. While lobes are fantastic piercings (especially first piercings), there’s a wide variety of cute piercings that you can place all over the surface of your ear.
If you wish to ornament your ears but do not know what ear piercings to add, this guide is undoubtedly for you! You could be getting ready for your first-ever ear piercing or may already have several. Both call for an understanding of ear-piercing types.
As someone who appreciates the finer things, you should keep in mind that you should always go to a legitimate piercer for any of these piercings. A piercer who uses needles and high-quality jewelry will give you a more beautiful and healthy result, so treat yourself.
We are obsessed with ear piercings which is why we hope to help all others that share this love. Our guide will talk about ear piercing types, the healing process, styling tips, how to get ears pierced, and more! So, stick till the end to find out!
With that in mind, keep reading for a few ideas on how to decorate your ears.
A- Complete Guide To Ear Piercings
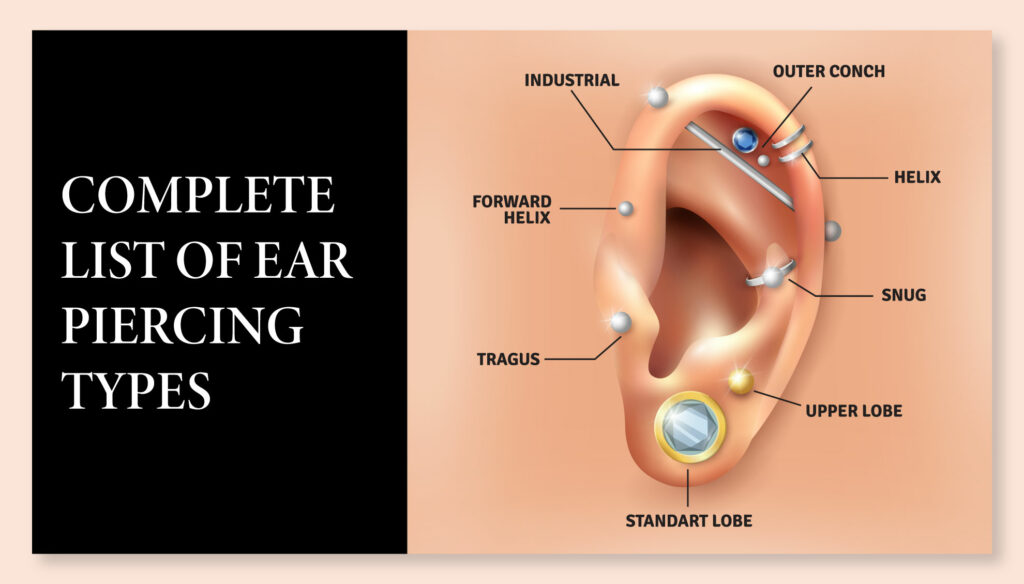
You can get no one but multiple types of coolest ear piercings. You may wonder what these are, what type will suit you best, and how many you should pick. To answer your queries, we have compiled a list of ear-piercing types below, check different types of ear piercings, and how long do ear piercings take to heal:
1. Daith Piercing
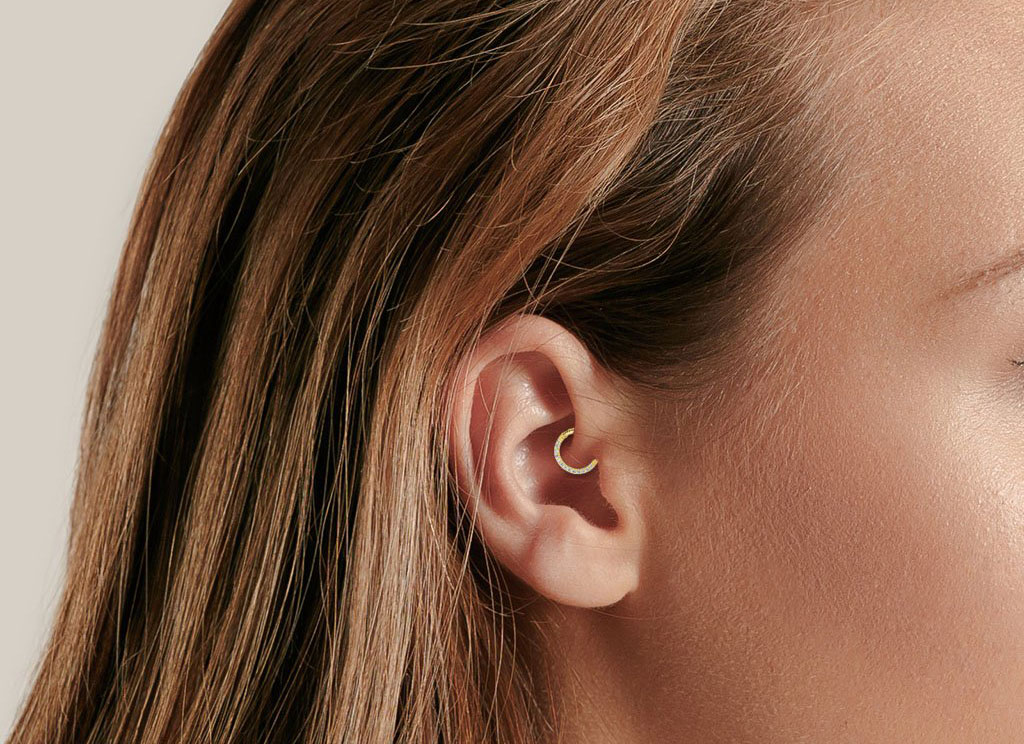
Many believe this piercing can help treat anxiety and severe migraines while looking chic. Fashionistas and celebrities are pretty fond of the Daith piercing.
The only downside is that the piercing location is slightly challenging, so professionals must be booked for the process. They may take a few seconds to land the piercing just perfectly. Once done, you can style your Daith with hoop piercing earrings to make your ears pop!
Position
The Daith is marked right on the tiny fold of cartilage present above the ear canal. This location can also be understood by seeing where the outer ridge of the helix ends at the inner ear.
Pain Intensity
- 6 out of 10
Healing Period
- 6 months to 12 months
2. Helix Piercing
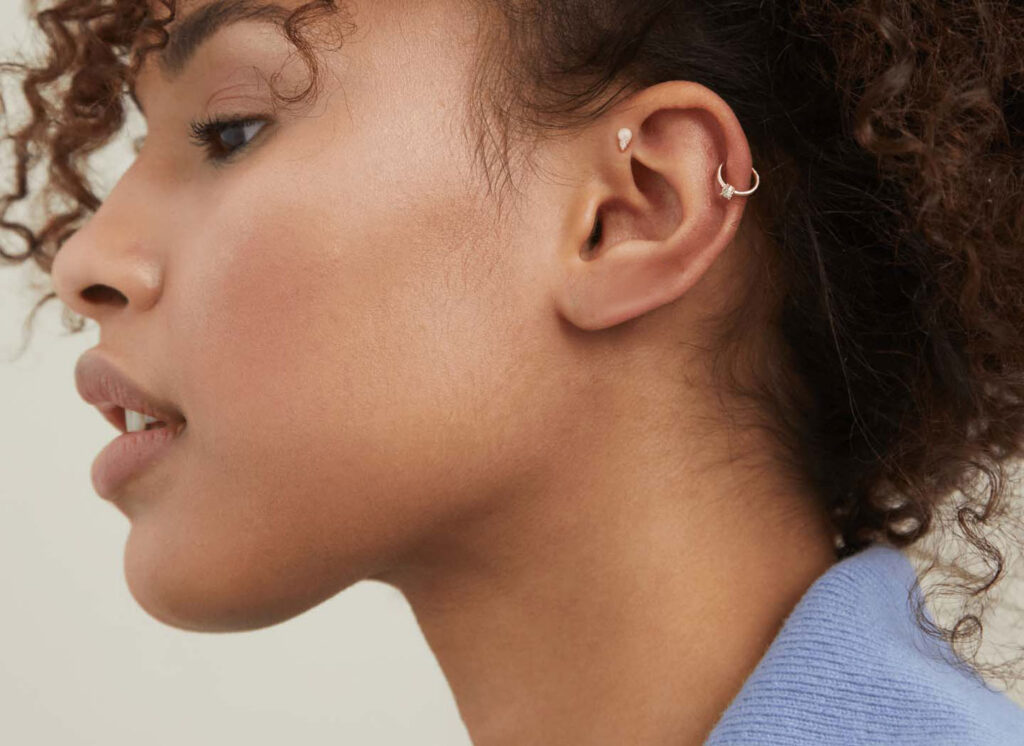
The helix is the most loved and fashionable cartilage ear piercing. The best part is that this piercing gives you an edgy look while allowing you to stay classy and stylish. The versatility of this piercing will enable you to adorn it with huggie hoops, studs, cartilage hoops, and even flat-back piercings earrings.
You can also add bling and two cartilage ear piercings instead of one to add more pizazz. That is if you know you can rock the double-pierced ears look!
Position
Piercing ear upper cartilage.
Pain Intensity
- 5 out of 10
Healing Period
- 6 months
3. Conch Piercing
If you wish to opt for an extreme piercing that allows you to wear an array of pierced earrings, then the conch is for you. You can get your outer or inner conch pierced to wear studs or go for cuffs that wrap around the ear’s outer edge for a sassy look.
The downside is that this piercing is slightly more painful than others. However, if you bear the initial pain and discomfort, you can rock a truly unique look!
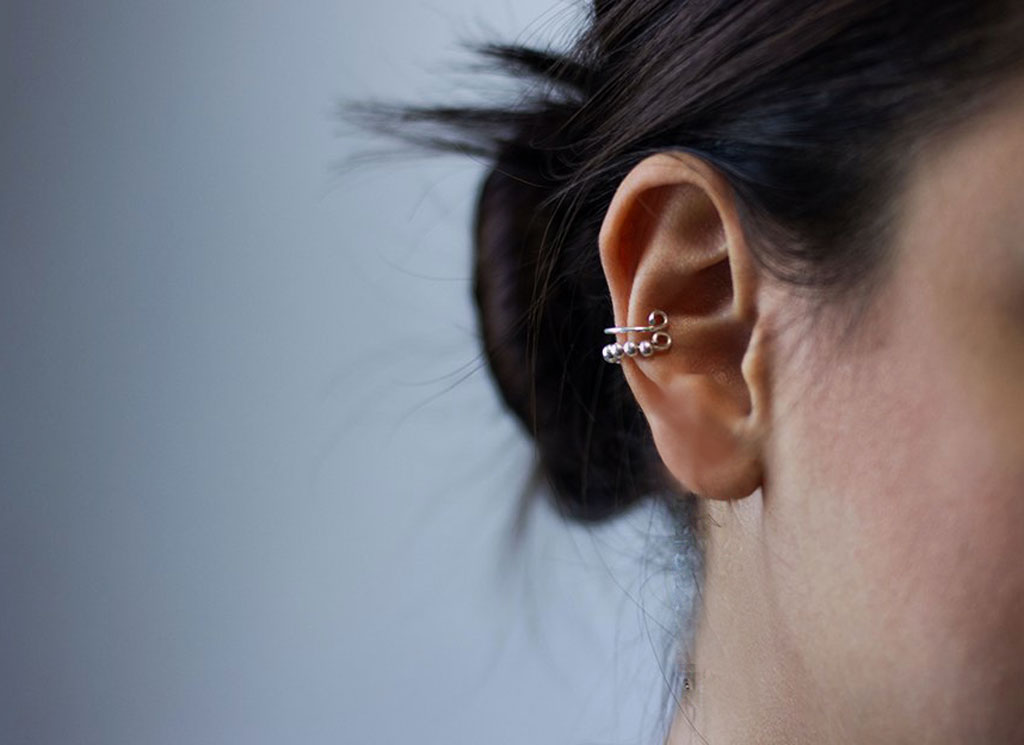
Position
The piercings are made in the center of the ear cartilage, which reflects the shape of a conch shell.
Pain Intensity
- 7 out of 10
Healing Period
- 6 to 9 months (needle ear piercing) or 1 year or longer (dermal punch piercing).
4. Tragus Piercing
The tragus piercing might be worth considering if you want a new ear piercing with as little pain and discomfort as possible. The tragus cartilage does not have as many nerve endings, so you will hear a pop when it is pierced, but the pain will not be as awful.
A tragus ear piercing looks excellent when adorned with flat backs, studs, and even huggie hoops. The tragus piercing combines classiness, style, versatility, and minimal pain into one!
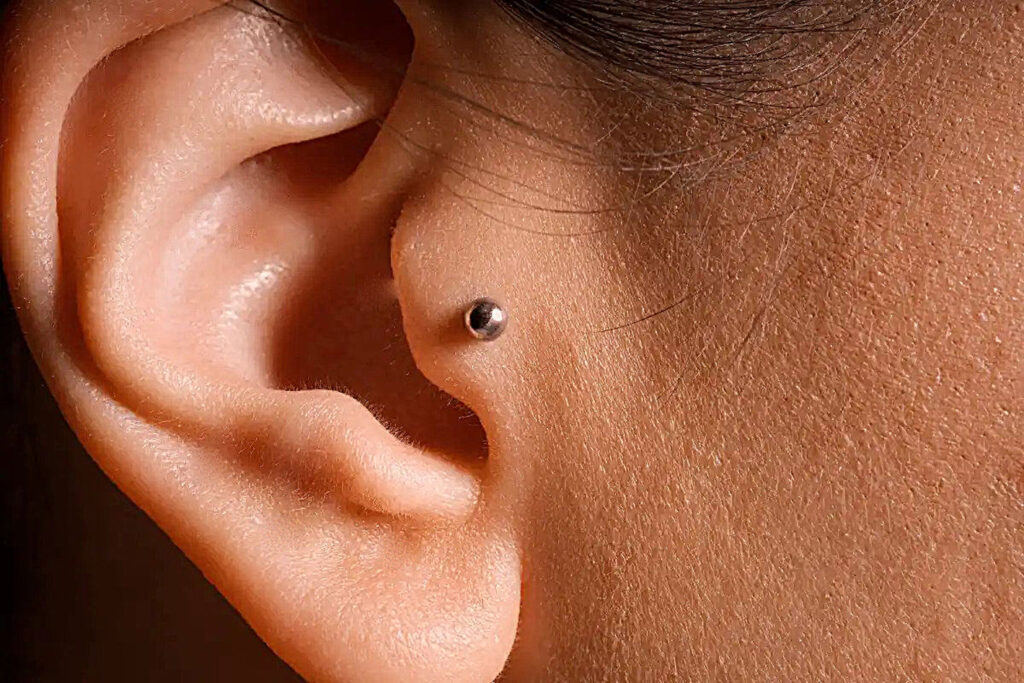
Position
The small flap covers the ear canal.
Pain Intensity
- 5 out of 10
Healing Period
- 3 months to 12 months
5. Forward Helix Piercing
If you did not know a helix piercing could get cooler, meet the sassy sister: the forward helix piercing. Even though tiny, this small cartilage adds a lot of bling and style when you adorn it with pretty hoops and studs.
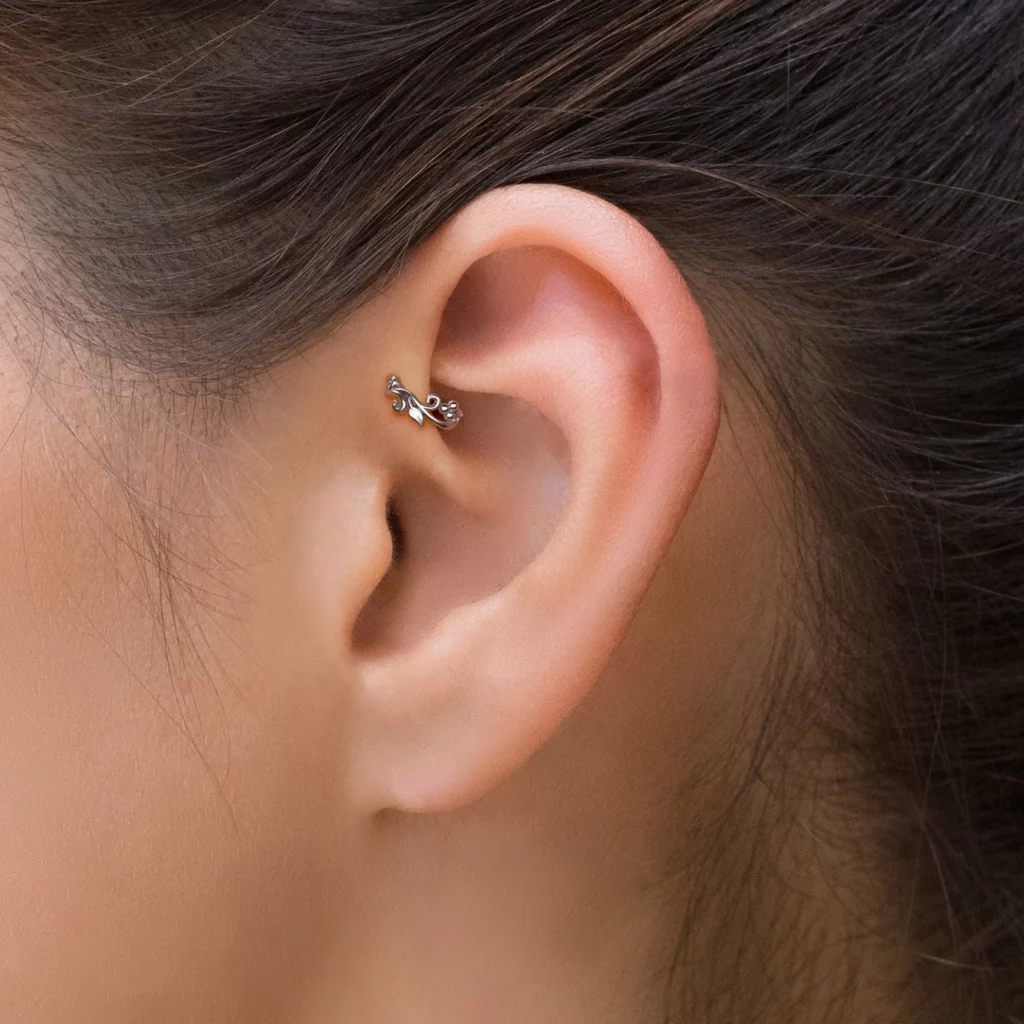
Position
A very tiny piece of cartilage where the face meets the outer ear.
Pain Intensity
- 6 out of 10
Healing Period
- 6 months
6. Flat Piercing
Our ears are our canvas, so we can choose to style them any way we like. A flat cartilage ear piercing is a beautiful way to adorn your ear to add an extra touch to your style.
It is the flat area right beneath the upper rim of your ear, so it is wide enough for more than one piercing.
If you have the heart and are willing to bear the pain of multiple piercings, flaunting shiny, colorful, or gold studs can make your ears bold.

Position
Flat surface present beneath the ear’s upper rim.
Pain Intensity
- 5 out of 10
Healing Period
- 6 months
7. Rook Piercing
No ear party is complete without a rook ear piercing. A rook can be accessorized with a curved barbell or cartilage hoops to create a unique look. Do not hesitate to opt for this ear piercing if you wish to make heads turn in awe.
A major con of this ear piercing is that not only will you feel a sharp pain when your rook is pierced, but your ear will also throb for quite some time. Opt for 2 piercings if you are bold enough because two are always better than one!
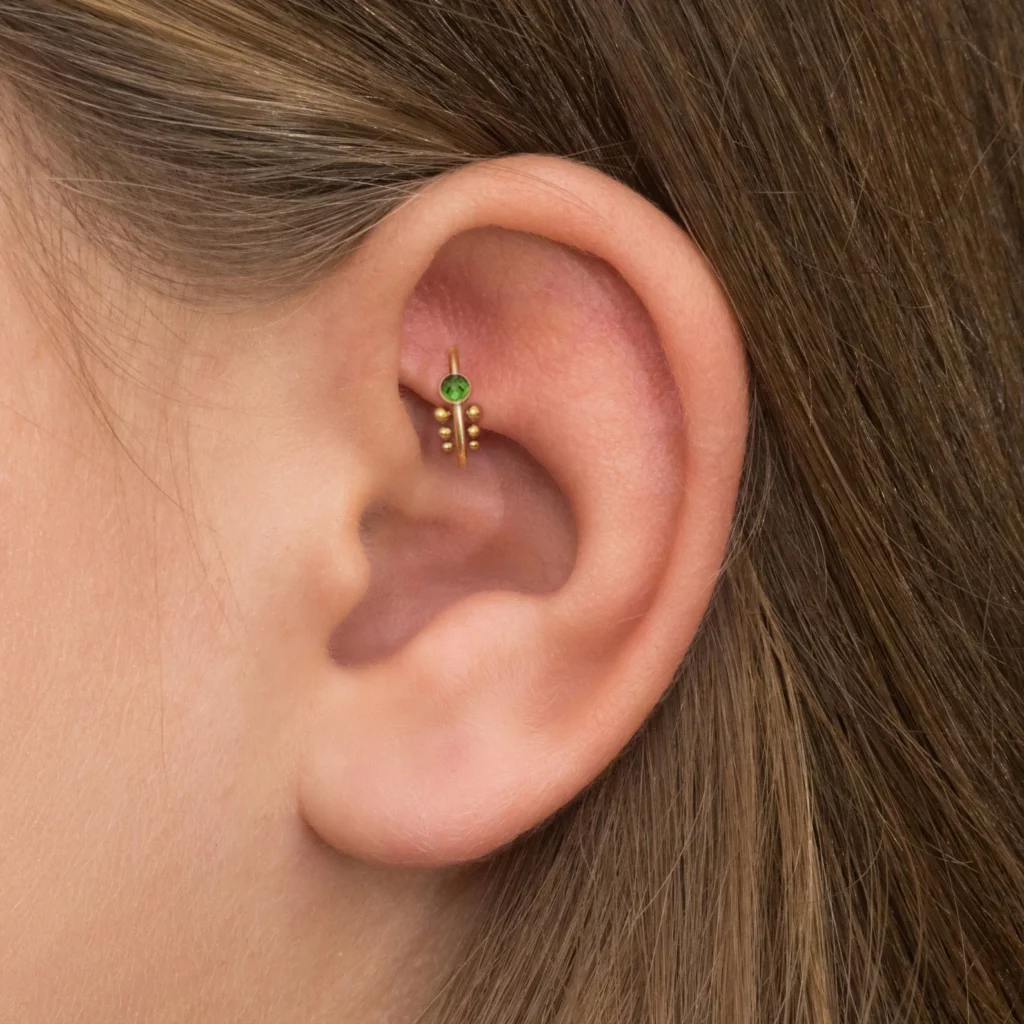
Position
The highest ridge of the inner ear.
Pain Intensity
- 8 out of 10
Healing Period
- 6 months to 12 months.
8. Lobe Piercing
A lobe piercing is probably the most common and is a standard first piercing that most people pick. It is also a common baby ear piercing.
The ear lobe piercings is versatile, simple, and classy and offers a low pain threshold. If you wish to increase the number of ear piercings you have but are not brave enough to go for a cartilage ear piercing, then simply opt for multiple lobe piercings. You get to upgrade your style without the added pain!
Since lobe piercings are so versatile, you can wear dangly earrings, huggie hoops, blinged studs, and even large hoops. A short healing time means it is one of the most suitable ear piercings for babies. There is no need to worry about ear piercing infections due to the baby’s ear being pierced.
You can also start switching up and wearing new jewelry soon after the ear lobe heals.
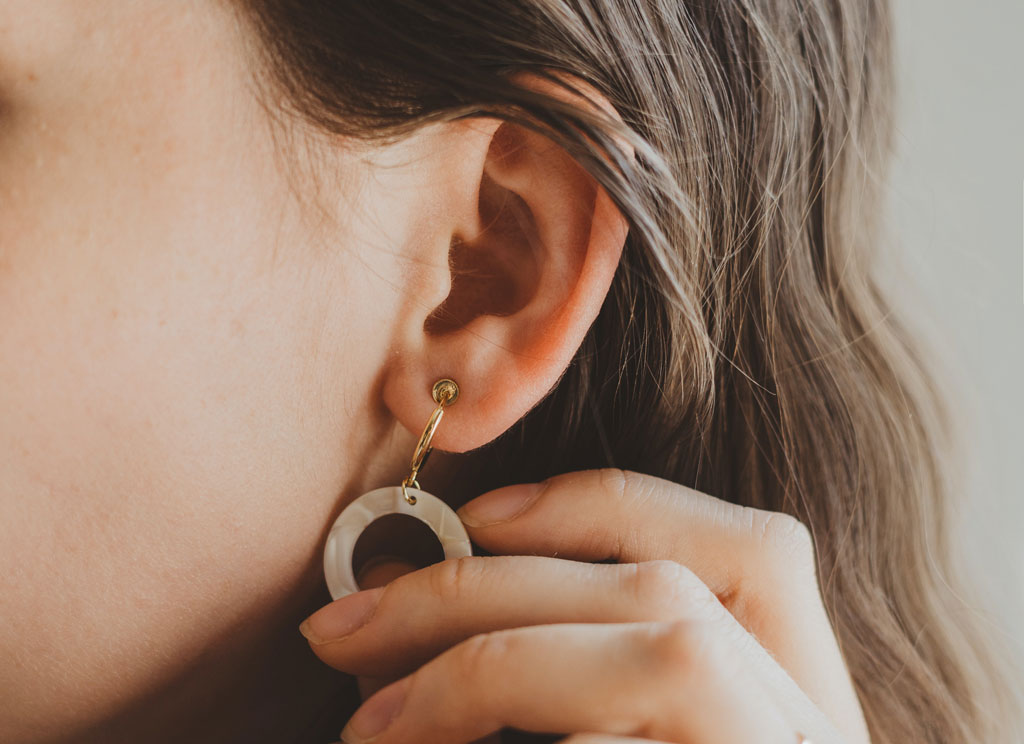
Position
The fleshy and soft part at the ear’s bottom.
Pain Intensity
- 3 out of 10
Healing Period
- 6 weeks to 8 weeks
9. Industrial or Scaffolding Piercing
Industrial ear piercing connects the forward helix and the outer edge of your helix piercings. Since there is no rule about how you connect these two piercings, the fashion and styling options are endless. You can speak volumes about your personality by adding these two bold piercings to your look.
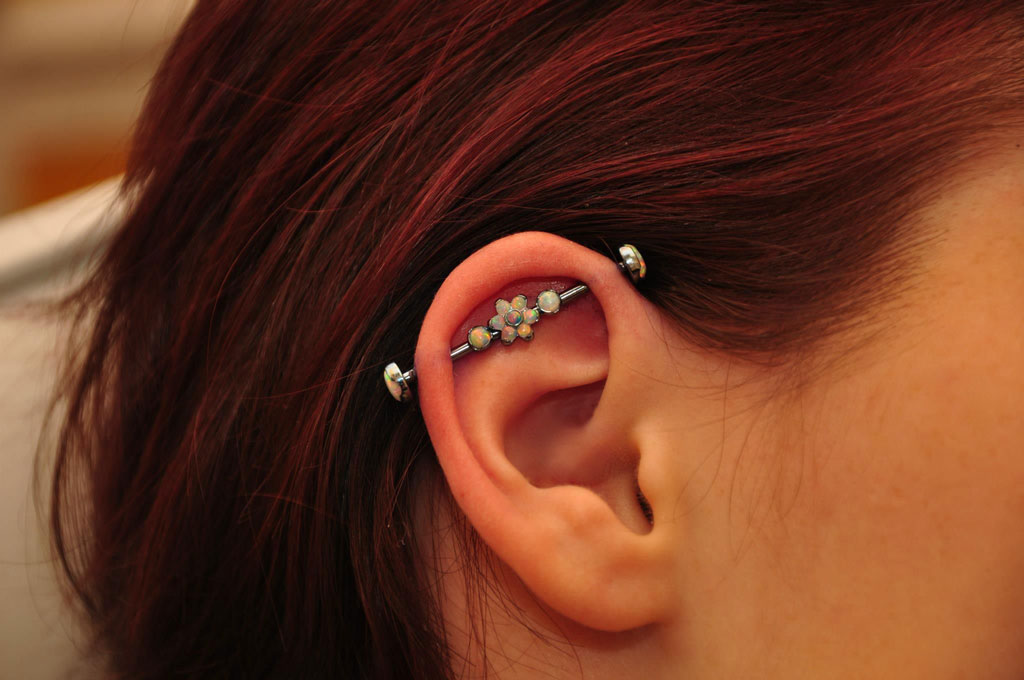
Position
Ear piercings industrial are dual piercings on the upper ear.
Pain Intensity
- 5 out of 10
Healing Period
- 4 months to 6 months.
10. Snug Piercing
Alternatively known as the anti-helix, this horizontal piercing goes through the inner ridge of the cartilage. This piercing is painful and only for those with high pain tolerance.
It is also the rarest and unique type. Cartilage hoops and curved barbells are the best way to make your ears look gorgeous if you plan on getting this piercing.
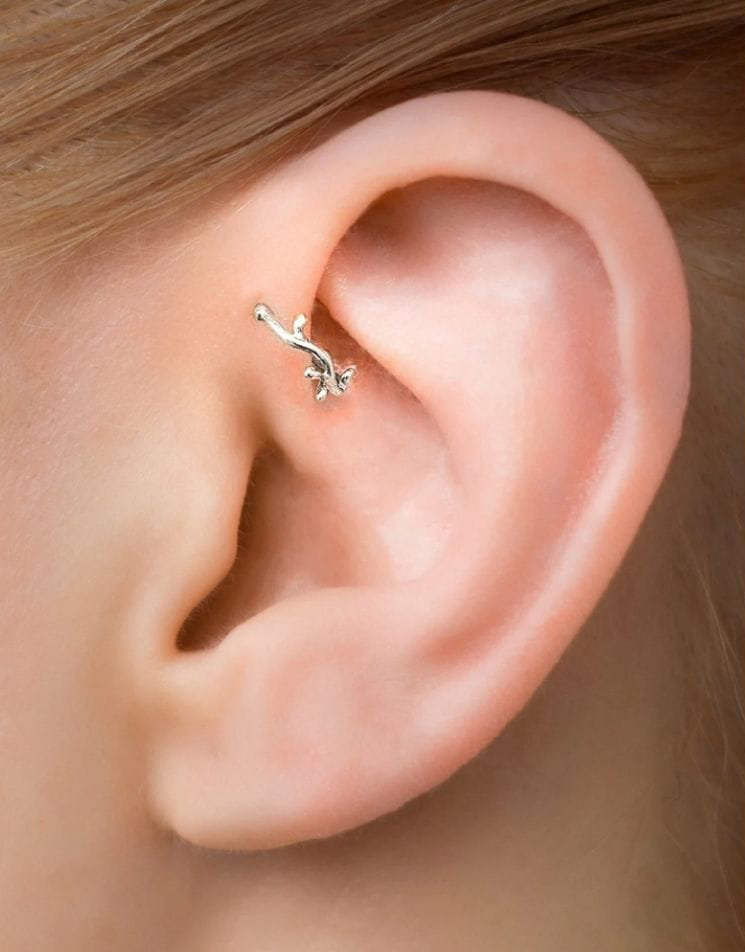
Position
Right above the anti-tragus and between the inner conch and middle helix.
Pain Intensity
- 9 out of 10
Healing Period
- 6 months to 9 months.
11. Helix Flap Piercing
The helix flap piercing is another helix piercing variant. However, your jewelry or accessory will be placed on the outside of the ear and not the inside. This one is, therefore, great for individuals with tiny folds over their ears. If you do, too, it is time to accessorize it!
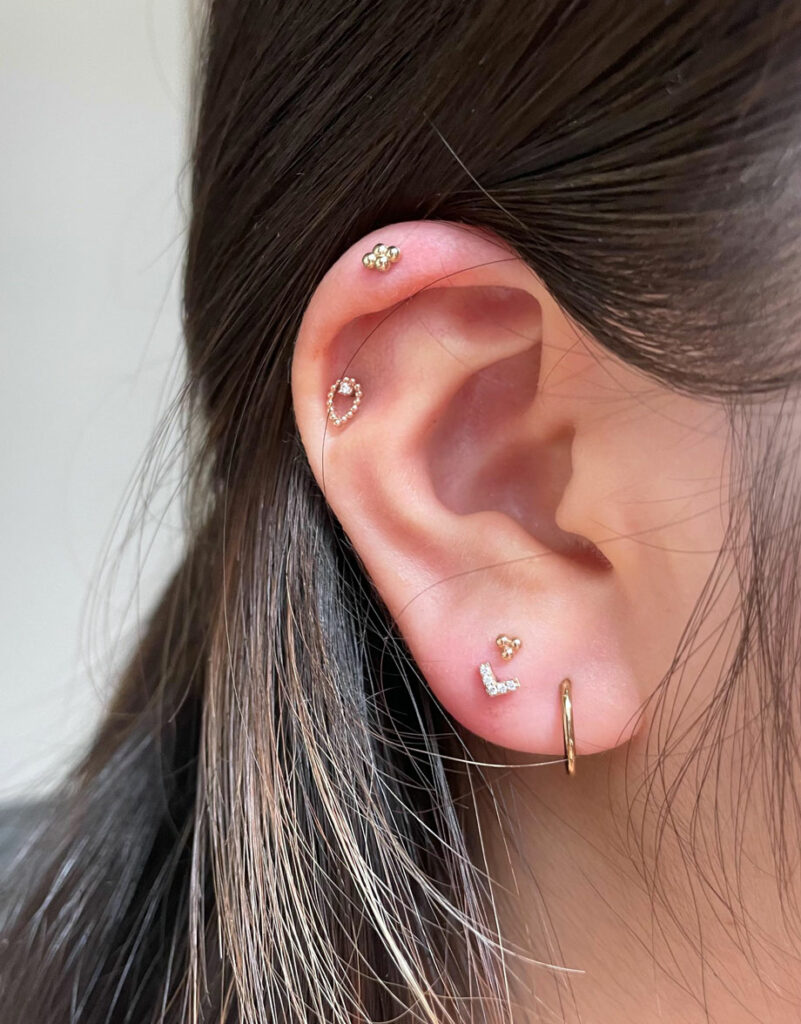
Position
Tiny flap over the helix on the outer ear.
Pain Intensity
- 5 out of 10
Healing Period
- 6 months to 10 months.
12. Anti-Tragus Piercing
The anti-tragus ear piercing allows your earring to go through the cartilage fold at the top of your ear lobe. This is often the highest point and is directly opposite to the tragus, hence the name.
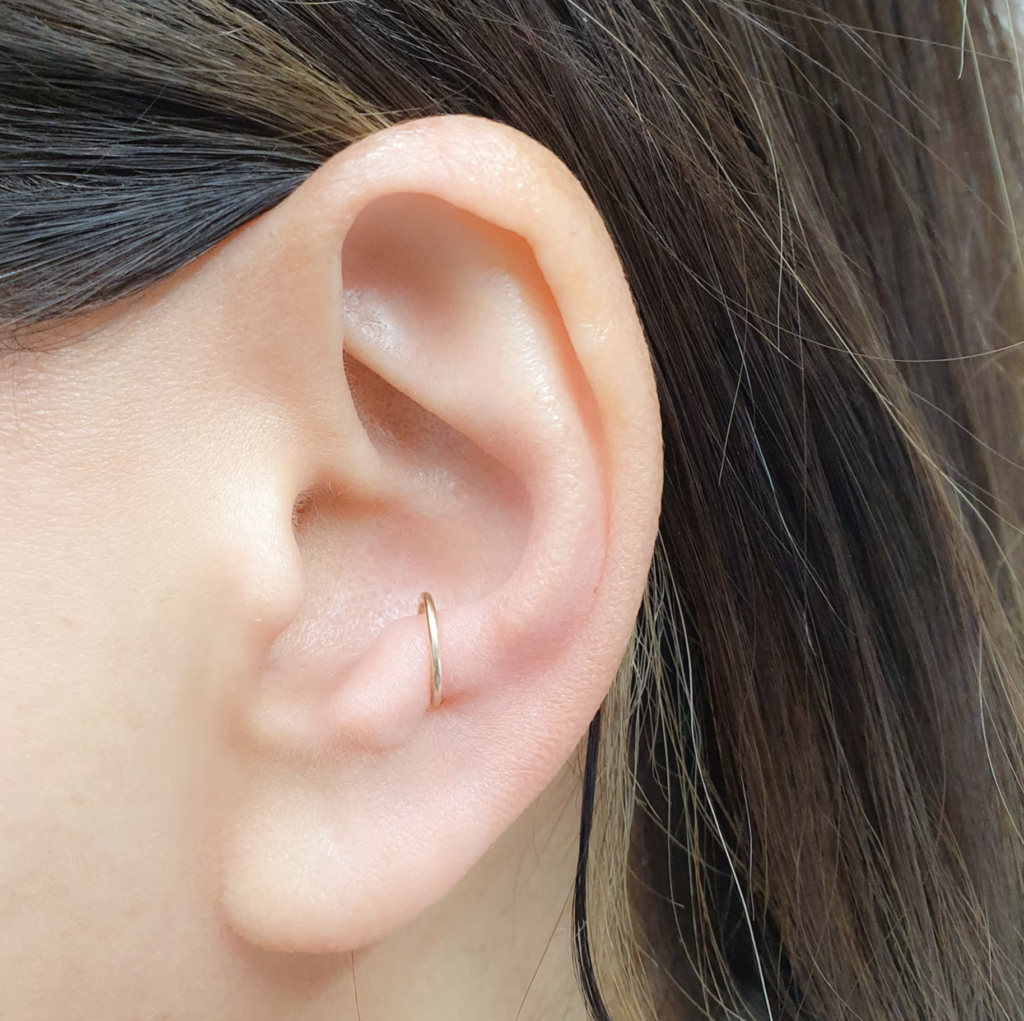
Position
Curved cartilage between the tragus and ear lobe.
Pain Intensity
- 7 out of 10
Healing Period
- 6 months to 8 months.
13. Orbital Piercing
An orbital piercing is a double ear piercing that allows one jewelry piece to pass through both holes to create an orbit. Some people may even opt for more than two. These piercings are commonly placed in the ear lobes but can be placed anywhere in the ear as long as you are willing and comfortable.
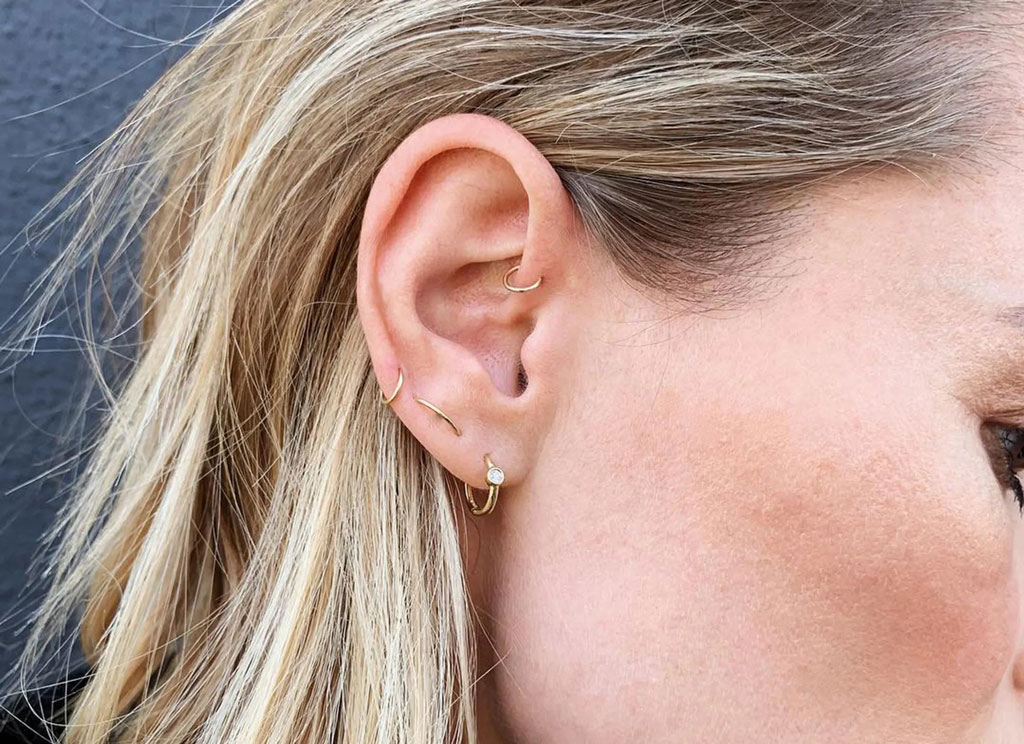
Position
They can be placed anywhere on the ear but are commonly pierced near the outer ear rim/helix or lobe.
Pain Intensity
- 5 out of 10
Healing Period
- 6 weeks to 8 weeks.
14. Constellation Piercing
Celebrity piercer Brian Keith Thompson coined the term constellation piercings. A constellation is a cluster of piercings that can be adorned with sparkly studs to make it seem like a constellation.
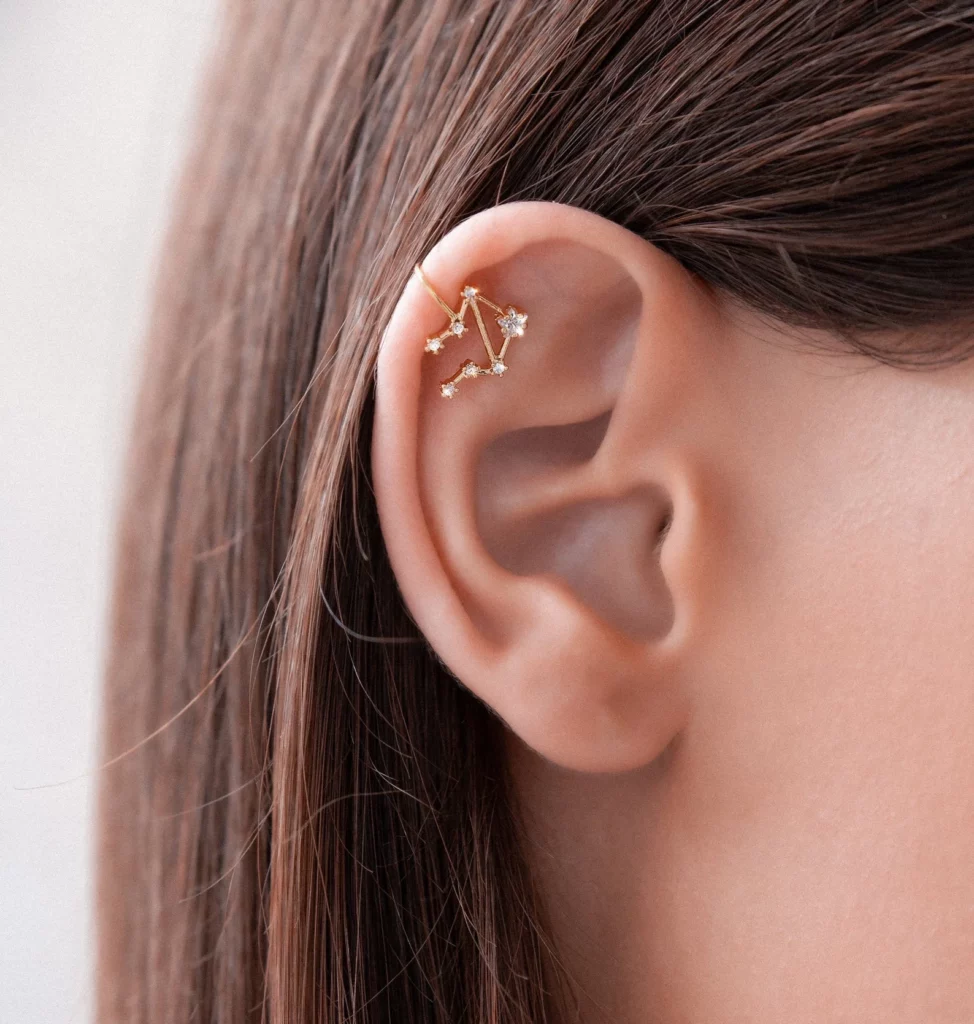
Position
Anywhere on the ear.
Pain Intensity
- Dependent on location
Healing Period
- Dependent on location.
15. Combination Piercings

Combination piercings are the most fun and can take your style plus classiness to the max. You can pick some of your favorite ear piercings by studying an ear piercing chart to wear beautiful jewelry and make a statement of your ear. You are free to choose any number of piercings you prefer with any combination you like. However, if you are confused, we have a few suggestions below:
- Several flat helix piercings, a tragus piercing, and a few lobe piercings.
- Dual cartilage piercings, snug piercing, and a stacked lobe.
- Flat lobe piercing, rook piercing, and 4 lobe piercings.
- Daith, flat lobe, and flat helix piercings.
16. Ear Projects

These aren’t real piercings; they’re ear projects! Many high-end piercers love doing ear projects with their clients.
When you start an ear project, you and your piercer plan the future of your piercings. You’ll see what piercings and earring types will look best based on your aesthetic and anatomy and, over time, build your project.
You don’t want too many piercings healing at one time, so a good ear project can take several years to complete.
B- A Beginner’s Guide to Handling A New Ear Piercing
Once you have your ear piercings, it is time to go accessory shopping. However, you need to know how to care for your piercing correctly to make it heal faster and prevent ear piercings infection. It is terrible to twist, turn or sleep on any piercings you get, as this hinders the healing process and may lead to severe infections, irritation, and redness.
Care for Newly Pierced Ears
All piercings should be cleansed with saline solution 2 to 3 times daily. It is also a good idea to stay away from hot tubs, pools, and water baths for at least 6 to 8 weeks until the piercing starts to heal. It is also essential to avoid ear-piercing contact with the following substances:
- Bactine
- Peroxide
- Harsh Soap
- Rubbing alcohol
- Harsh chemicals
- Neosporin
- Perfume
Clean A New Ear Piercing
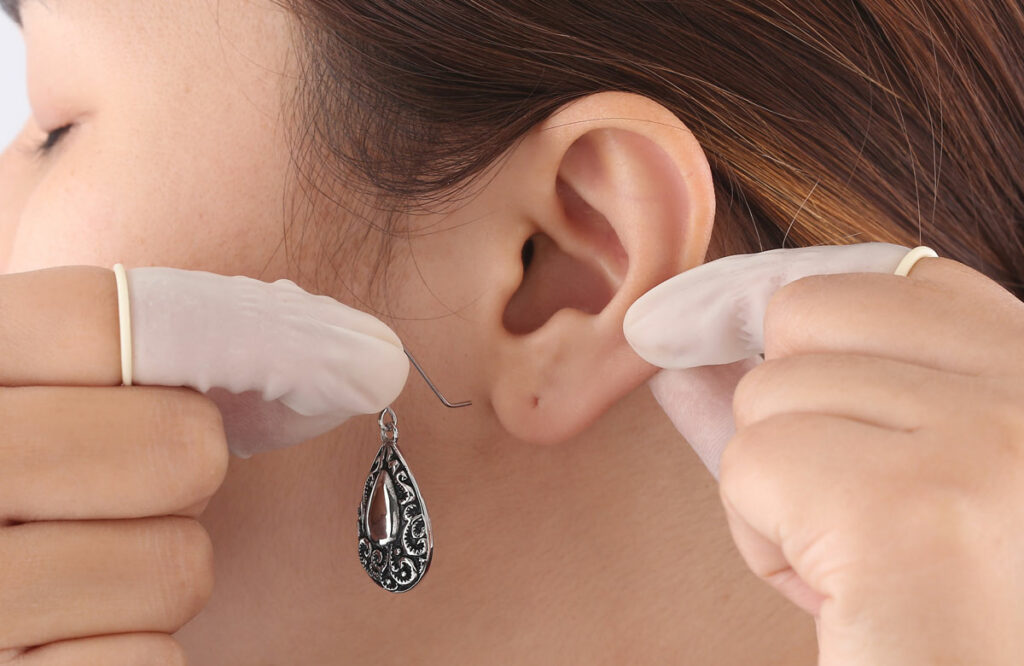
- Wash your hands thoroughly with antibacterial soap. Always carry hand sanitizer around if you have to touch your piercing while on the go.
- Dip a cotton swab or ball into the cleaning solution. This can be a sea salt solution (1/8th tsp of sea salt per 8 oz. of saline) or isopropyl alcohol.
- Clean the ear lobe and piercing twice daily. It is also a good idea to use separate swabs or cotton balls for both the front and back of the piercing.
- Gently turn earring posts halfway in both directions.
- Apply antibiotic cream or ointment and turn the earring post in both directions to get the ointment into the skin.
- Do not remove your earrings, as this can cause your piercings to close. Refer to the ear piercings chart and healing duration before taking your earrings out.
Clean A Tragus Piercing
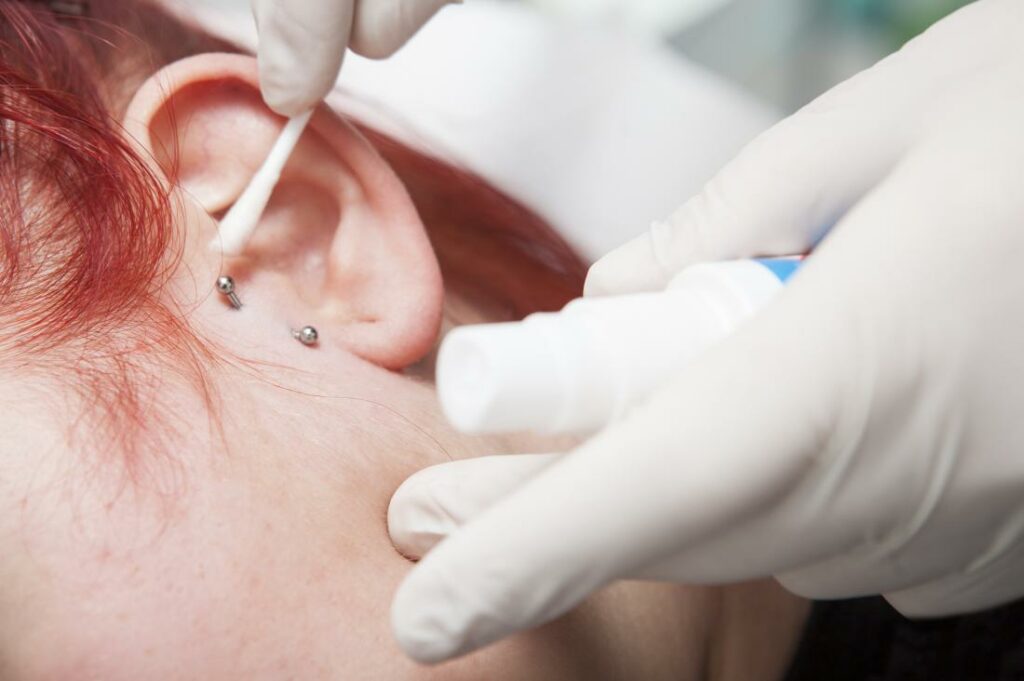
- Buy natural sea salt and distilled water at a supermarket. You will have to clean your piercings twice daily for at least 6 to 8 weeks.
- Mix 33 grams (4 tsp) of sea salt into 3.8 liters (1 gallon) of distilled water to form a solution. Shake your bottle well to do this. You can store your solution until the next time you clean your claire’s ear piercing.
- Fill a mug about 3/4th with the solution and heat it in your microwave. Make sure the mug is large and warm it up for 20 to 30 seconds.
- Soak your tragus piercing in the saline once or twice daily. Gently lean your head on the side and immerse your ear until the tragus is submerged. Let it soak for 7 to 15 minutes.
- Alternatively, you can use a compress to clean your piercing by folding a paper towel into fourths and soaking it in the weak solution. Hold the soaked towel against the tragus piercing for 7 to 15 minutes.
- Once your ear is done soaking, it is time to rinse the ear piercing with clean water to get rid of the salt. Use your hands to cup water and splash clean water onto the ear 2 to 3 times.
Clean An Industrial Piercing
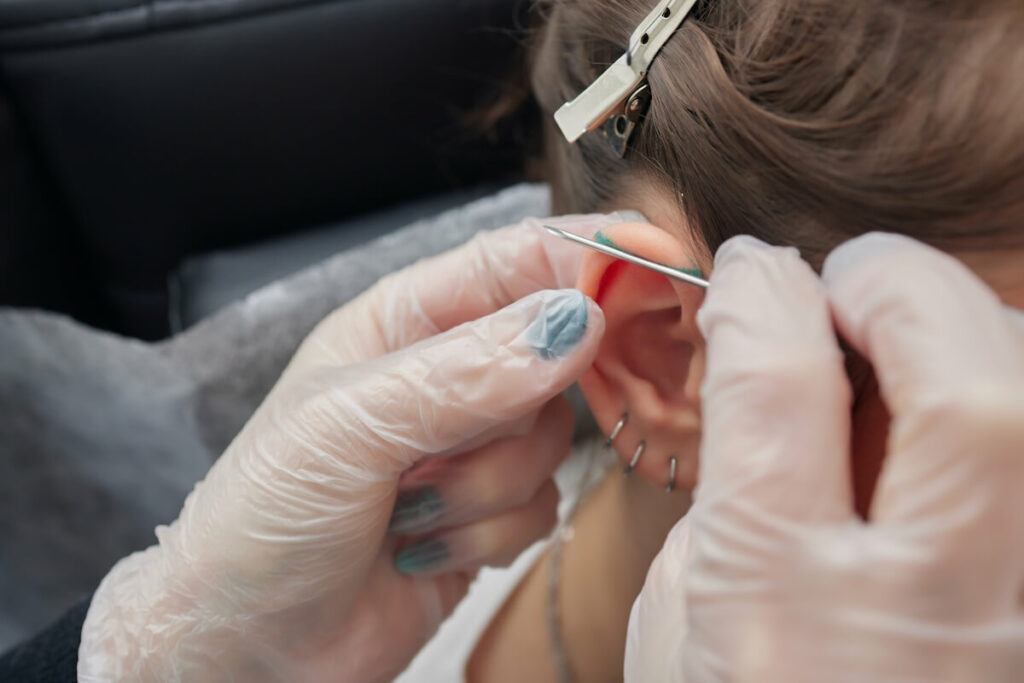
- Run your piercing under warm water from the sink or shower for 30 seconds. This will loosen dry skin, flakes, and crusts.
- Lather antibacterial soap onto your hands using warm water and gently use your fingers to clean your piercing. Use your pinky to clean the metal rod and gently twist the piercing. Get behind the ear plus inside and rub gently for 3 minutes.
- Rinse the soap off with warm water and dry the piercing. Use a towel or disposable tissue to get the piercing completely dry.
- Alternatively, swab sea salt solution or soak your ear to clean your industrial piercing.
Clean Ear Gauges
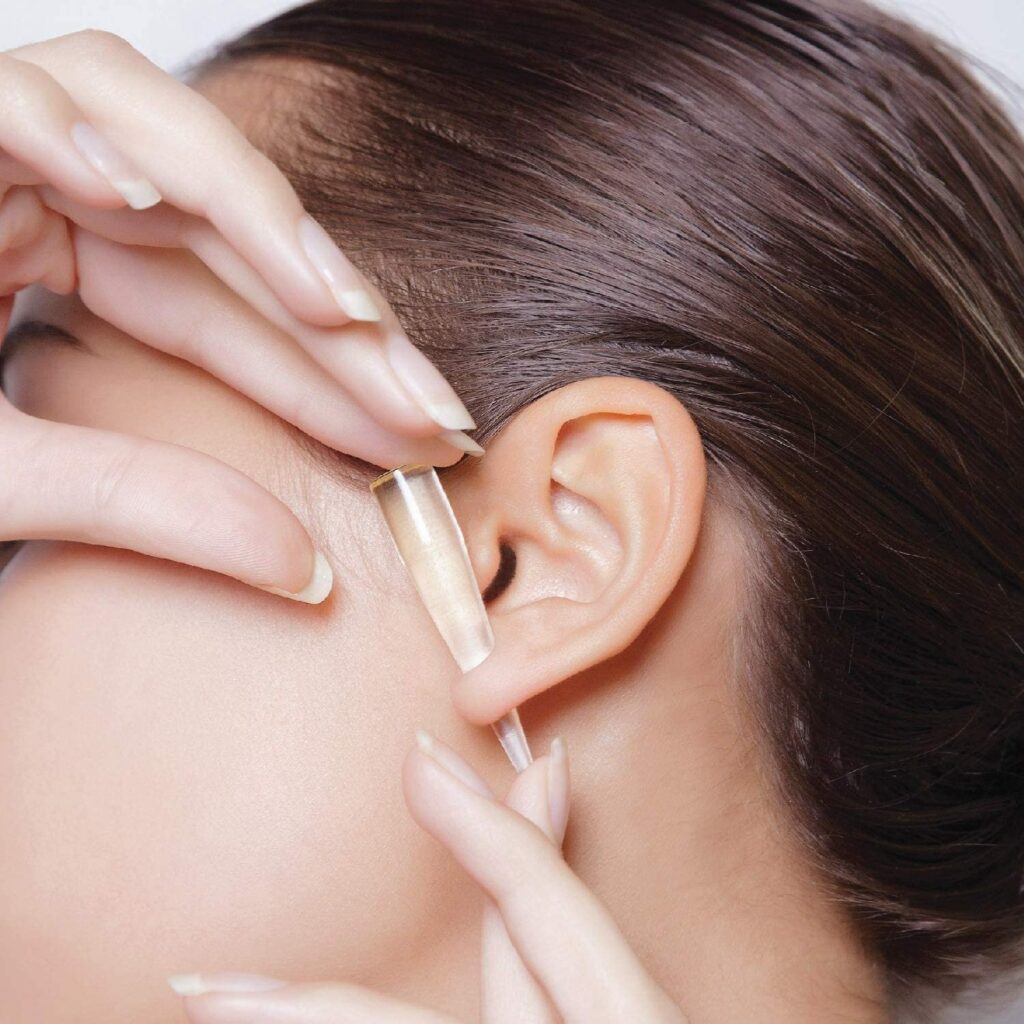
- Lather ear gauges and synthetic jewelry with antibacterial soap, rinse with cold water, and pat the jewelry/gauge dry. This technique is best for PTFE, Bioplast, Metal, Acrylic, dental acrylic, silicone, and glass jewelry.
- Stone or horn jewelry is made from organic materials, and antibacterial soap is too harsh for them. You can use baby soap instead and repeat the above process.
- Clean wooden jewelry with a damp cloth or towel. Never submerge wooden accessories in water, and finish off with Jojoba, Olive, or Coconut oil for conditioning.
Read also: Cute And Easy-To-Style Short-Layered Hairstyles
C- Ear Piercing Guide

Let us now look at a few sections that help you understand ear piercings better:
Get Your Ears Pierced
Select the type of ear piercing you want to get. The placement will affect piercing prices. Lobes cost around $20, and a helix orbital costs around $80 or more. Mainly, prices vary from $30 to $50. Lobes are a popular choice as an ear piercing for baby. Some places also pierce for free. Piercing studios charge for both the earrings and the piercing, especially when you pick one for an ear piercing baby.
Have a snack and drink to keep your blood sugar up before you go. Take a friend with you for support and reduce anxiety/fear.
You can also choose whether you want to use an ear-piercing gun or other techniques. Note that an ear piercing gun or ear piercings gun tends to cause many infections as it pushes the earring straight through. However, it is a cheap method to get your ears pierced. Ears pierced guns cannot be sterilized thoroughly, so keep this in mind before you decide.
The hollow needle method sounds painful, but it is not. This is also preferable as it leads to fewer infections and slow healing.
Always pick an experienced or professional piercer and check reviews online to decide if you are unsure.
Ensure the studio you visit is clean and they use disinfected tools, proper ear piercing kits, and gloves. They should also have sterile packets for every new needle.
Pick out your desired earrings. Make sure you pick material that is safe, the best quality, and that you are not allergic to it. Opt for surgical stainless steel, platinum, titanium, and 14K gold.
Once the professional marks dots on your ears, examine them carefully in the mirror, so you know they are precisely where you want your piercings to be.
Take a deep breath. You will feel slightly pink in most piercings, but thicker cartilage will require a few seconds.
Keep your earrings in for the recommended duration or at least 6 to 8 weeks.
Clean your piercings regularly, and make sure to wear lightweight accessories to allow them to heal properly.
Do not unnecessarily touch your piercings; seek immediate help from a doctor if you have an infection.
Pierce Ears with a Sewing Needle
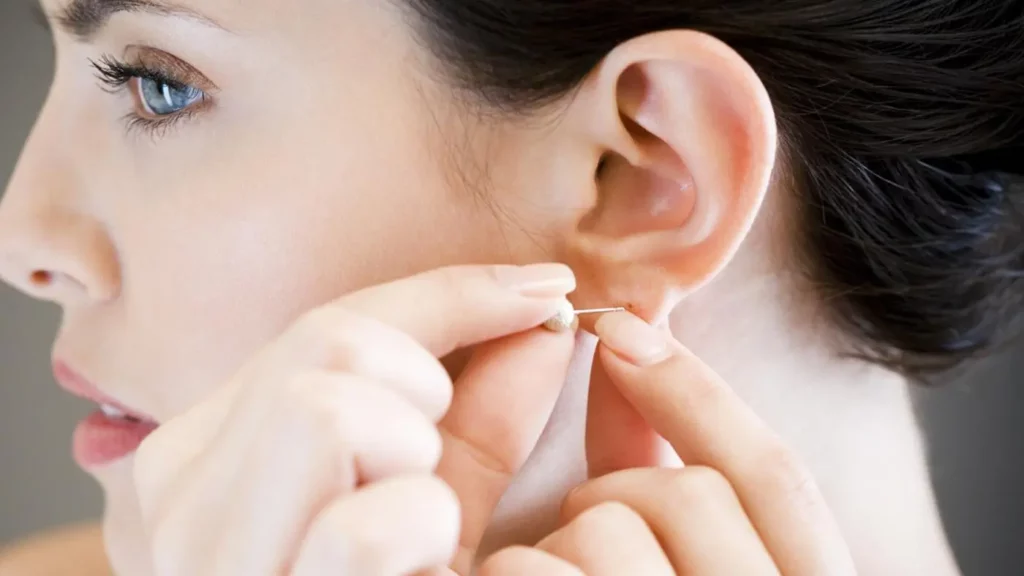
- Sterilize, clean, and disinfect the equipment you will be using and the place where you will be piercing your ears.
- Wash your hands and sanitize them. Sanitize the needle or safety pin by placing it in a bowl of boiling water for 2 minutes.
- Place the earrings and needle in an alcohol solution to disinfect them. After a few minutes, take them out, disinfect them and dry them with a paper towel.
- Wash and disinfect your hands again. Next, disinfect your ear.
- Apply numbing gel and mark your ears as you wait.
- Use the needle to pierce the spot you have marked swiftly. Make sure to do this at a 45-degree angle from your head because otherwise, you might pierce your head.
- Place your jewelry in as quickly as possible.
- Disinfect and clean the pierced area.
- Wash your hands and clean up any mess you make.
Gauge Your Ears/Stretch an Ear Lobe Piercing
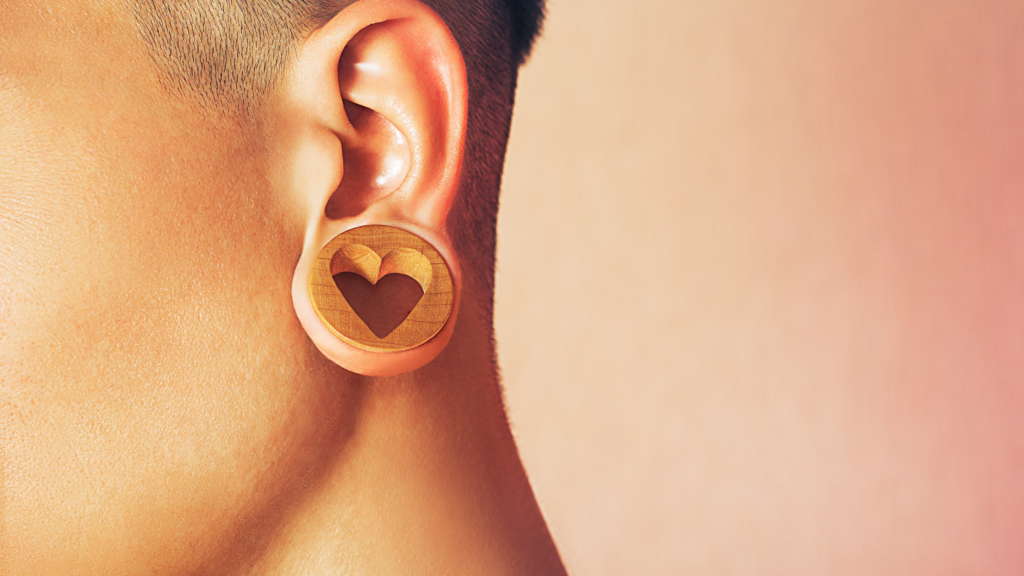
Go to a trusted professional or location with proper ear piercings kits and sterile equipment.
Wait for six weeks to 10 weeks before you start stretching your piercing. The piercing should have begun to heal before you go about stretching it and must not be stretched if it is infected.
Start with a 14 gauge or 16 gauge to begin stretching. Buy tapers from a studio based on your gauge size. Make sure that your stretching ear piercings kits are the right taper size before buying.
Massage your piercing with oil such as coconut or Jojoba. Also, make sure to wash your hands thoroughly before the massage.
Push the taper through the piercing gently but stop if it goes no further. It will hurt, but it should not bleed. If your piercing gets wounded, remove the taper, disinfect and treat your pursuing and restart once it heals.
Once the taper helps stretch your piercing, you can replace the taper with plugs or tunnels. Do this by aligning your plug/tunnel at the larger end of the taper and pulling the taper out until the taper falls out completely.
Once the taper is replaced, you can add your jewelry. Always wait a few weeks before stretching your piercing further.
Close Gauged Ears
- Make sure your expectations are realistic. Closing depends on skin elasticity, gauge size, and the time it takes to stretch.
- Start decreasing plug size and wear your reduced size for 3 to 4 days.
- Do not switch sizes too drastically, as this causes plugs to fall out.
- Continue decreasing gauge size until you hit the 17-gram gauge.
- Once you hit the desired size, remove the gauge, disinfect your ears and wash your lobes.
Gauge Your Ears Without Getting a Blowout
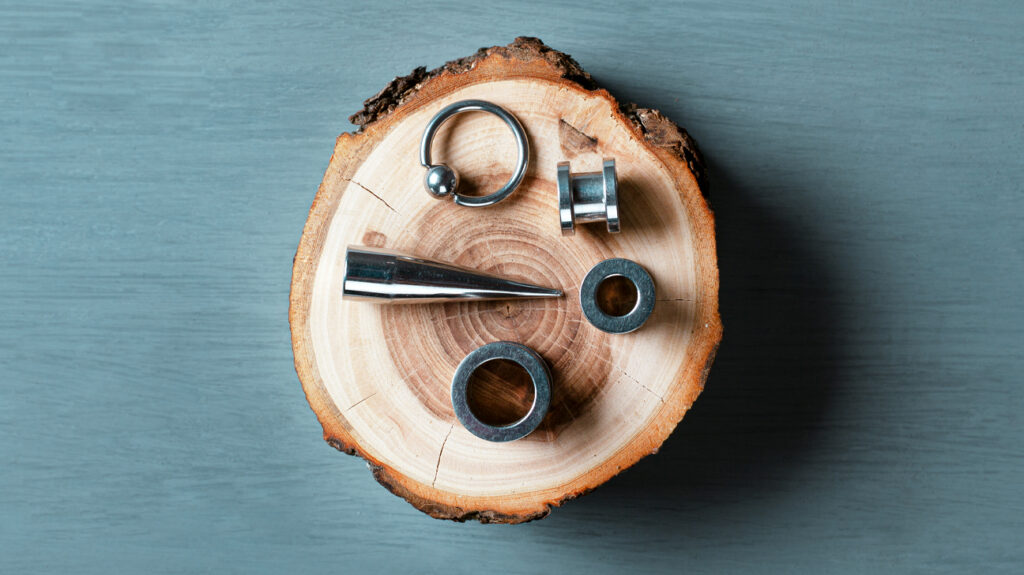
- Invest in a good lubricant such as Vitamin E oil, Olive oil, Coconut oil, or Jojoba oil. Do not use Vaseline.
- Purchase a new steel or glass taper. Opt for 316LVM steel.
- Take a hot shower to open up pores and increase skin elasticity.
- Lubricate your taper thoroughly and carefully pass it through to prevent ruptures.
- You can opt for the taping method if the tapers are not working or stick to the size you used before.
- Ensure your plug or tunnel is clean before passing it through.
- Pull the taper out until your jewelry is in place, and never wear tapers for too long.
- If your ears bleed, are infected or if it hurts too bad, remove your jewelry and downgrade to the previous size.
Hide Gauges
- Cover them with your hair.
- Stretch large gauges right over your ear and let them sit there.
- Wear a cap or other accessories, such as skin-colored jewelry, to hide your gauge.
- Avoid tapered jewelry and wear earrings or studs that better fit the size of your piercing.
- Shrink your gauge size if you do not enjoy larger gauges anymore.
Stretch Ears Without Tapers
- Wear heavier earplugs to stretch your ears.
- Keep the ear plug lubricated so the skin around it can breathe and stay elastic instead of sticking to it.
- Remove your current plug gently to place a new one. Make sure to disinfect it and clean your ear and the new plug before inserting the other one. A bigger new plug will help you stretch your piercing.
- Wait at least 2 to 3 weeks before you start upgrading plug size or wearing other heavy jewelry.
Get an Industrial Piercing

Pick an excellent piercing studio, check out their reviews and prices online or get in touch with a suitable professional.
Call potential studios to learn more and shortlist the best possible choices. Next, start visiting each so you can make a final decision.
Visit the studio to see if they maintain cleanliness, hygiene, sterility, safety, competence, and experience.
Get friendly with the professional who is going to pierce you to learn more and get them to answer all your queries. Once you feel a studio/professional is suitable, you can make an appointment.
Always talk to your doctor if you are under medication or have a medical condition before getting your ears pierced.
Keep a photo of yourself and cash with you when you go for your appointment. Arrive a few minutes earlier and see the professional preparation for your piercing. Make sure everything is new and sterilized. The bar should be long enough to allow swelling. A good piercer will guide you through the entire process.
The piercer will disinfect the dedicated ear location and mark it. Make sure to examine these markings to ensure you are satisfied.
Sit back, relax and breathe as you are getting pierced. You will hear a prick through both holes, and industrial piercing does take a few seconds.
Meditate, breathe, visualize or talk to someone nearby to distract yourself from the pain. Keep breathing and stay calm until the second hole is pierced.
The piercer will now disinfect your ear again and clean it. Now all you have to do is pay!
Self Pierce, An Industrial
- Wash your hands and disinfect them.
- Sterilize the needle.
- Use a pen to mark holes.
- Place a cork or cloth behind your ear for support as you pierce with a needle.
- Quickly pop the needle through the mark. You should be able to hear three faint pricks.
- If you use a hollow needle, you could simply use it to pass jewelry through. If you use another needle, you must manually move it and place it in the jewelry.
- Repeat the piercing process with the second hole, but this one might bleed as blood has already rushed to your ear.
- Disinfect your piercing, and you are done. Close the accessory off.
Pierce Your Own Tragus
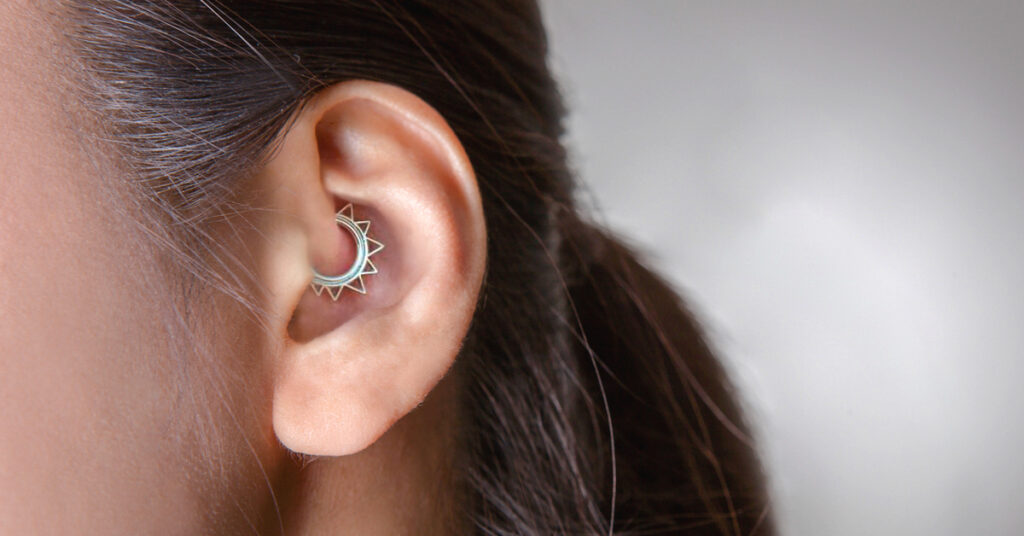
- Think about whether you want to do this on your own. You can always contact a professional.
- Pick out the correct needle size and jewelry you wish to wear.
- Get safety and sanitization supplies ready. This includes disinfectant, cork, gauze, gloves, cotton balls or swabs, and antiseptic solution.
- Wash your hands and disinfect them. Also, disinfect your needle, jewelry, and ear.
- Place a piece of cork behind your tragus.
- Line the needle up using a mirror to keep it horizontal. Mark the area if you are not sure.
- Firmly and quickly, pass the needle through your tragus. Do not jerk the needle or push at an angle. Never stop midway, as this prolongs the pain.
- Leave the needle in for 10 minutes.
- Thread the earring through and place a stopper.
- Use gauze to clean the region and disinfect it.
- Keep the earring in for at least 4 to 6 weeks and monitor the site for any infections.
Take A Tragus Piercing Out
- Wash your hands and disinfect them as well as the new jewelry you want to place in. Also, make sure to disinfect your ears.
- Pull your hair back and expose the jewelry, making it easier to grab.
- Unscrew the older stud if it’s a ball earring, or simply remove a flat back if it has a stopper. Make sure to hold both parts of the earring with both of your hands not to lose the other side when one portion falls off. Unsnap a segment ring gently if you have that on instead.
- Place your new jewelry in and secure it.
Hide An Ear Piercing
- Wear your hair down.
- Wear hats and beanies.
- Use a scarf.
- Do not wear flashy earrings to make them go unnoticed.
- Use quartz retainers or wear skin-colored jewelry.
- Apply concealer.
Re‐Pierce Ears
- Pick a professional or relevant ear piercing studio with good ratings and a reputation for hygiene and safety.
- Visit the location and speak to your piercer about your current ear piercing.
- The piercer should be APP qualified and should be able to perform basic first aid and CPR.
- Watch how they pierce others.
- Make an appointment if required and pick out jewelry. Opt for high-quality steel or gold.
Reopen a Partially Closed Ear Piercing Hole
- Disinfect your hands, a needle, and the jewelry you wish to push through.
- Use a skin-numbing gel to feel less discomfort. Apply the gel half an hour to 1 hour before attempting.
- Place a cork or potato piece behind your ear to see if the needle can pass through. Make sure to disinfect your ear before you do this.
- If you cannot remember the spot, mark it with a pen.
- Cover earrings with Vaseline and gently twist and turn to see if they can pass through. Refrain from pushing or rubbing too hard.
- Use an ice cube to numb and soothe the area if you are successful.
- Thread your jewelry through the hole and repeat with the other ear.
Heal a Cartilage Piercing
- Cartilage piercings need to be cared for at least four months to a year.
- Make sure to clean and inspect piercings regularly and watch out for swelling, numbness, redness, pain, or itching in the first few weeks.
- Make sure to talk to your piercer and follow any guidelines they ask you to help your piercing heal better and faster.
- Always ask your piercer about any products you need to avoid.
- Always wash your hands and disinfect them before touching your piercings.
- Use saline or alcohol to disinfect your piercings for at least 6 to 8 weeks and 2 to 3 times daily.
- Always pat the region dry after disinfecting and dab dry after showers.
- Lubricate your piercing with Jojoba, coconut, or olive oil. Gently rotate your piercings in both directions to allow the hole to get some moisturizer as well.
- Twist your earrings a few times daily to allow your skin to breathe, and avoid using harsh chemicals or cleaning products.
- Keep everything your ears touch super clean, including your phone, pillows, hats, helmets, glasses, headphones, bedsheets, etc.
- Eat well, stay hydrated and sleep in a position so as not to place pressure on your piercings.
- Avoid washing your piercings in the shower.
- Consult a doctor if you notice swelling or suspect an infection.
Get Rid of a Blowout in the Quickest and Easiest Way
- Sanitize and clean your hands, jewelry, and ears.
- Soak your gauge in a saline solution.
- Lubricate the gauge with oil.
- Repeat the steps thrice daily and apply ointment.
- Downsize if an upgrade caused the problem.
- Go to a larger gauge only after your piercing has healed.
Read also: Luxurious Looks: The Best Makeup Brands and Products
Pick Earrings When You Get Your Ears Pierced
Surgical steel earrings are the best choice for new piercings. You can also opt for platinum, gold, or titanium earrings. Make sure you talk to your doctor about any allergies to prevent adverse reactions later on.
It is a good idea to pick smaller hoops as they are easier to clean. Alternatively, you can opt for ball-closure rings, spring-closure earrings, or studs. Do not pick studs with stones and catchy points that can grab onto fabric and cause them to tug at your piercing.
Also, remember to pick lightweight earrings, as you will have to keep these on for at least six weeks to 8 weeks until your new piercing heals or until you can change them.
Make Fake Earrings
- Get a notebook with a metal spiral. You can also get 20 to 24-gauge wire from a jewelry store.
- Use wire cutters to snip a loop off the notebook spiral. Cut 1 to 2 inches of wire if you are using jewelry wire.
- Slip a pretty bead or crystal into the hoop. You can also use a dangler from a necklace or bracelet as well.
- Use round pliers to twist each wire inwards. Shape this until you have the perfect wearable earring!
Take Care of Infection in Newly Pierced Ears
You can confirm you have an infection if you notice redness, swelling, bumps, or much pain. Wash your hands thoroughly, remove the jewelry, clean your ear and disinfect the piercing.
Disinfect the jewelry and use a saline solution to disinfect your piercing hole thoroughly. Reinsert the earrings and repeat this process daily.
Use pain medications if required and consult a doctor immediately if the infection worsens.
Treat an Ear Piercing Infection Bump/Treat an Infected Ear Piercing
Check what is causing the issue and see if the problem lies in jewelry quality, trauma, improper care/cleaning, or piercing angle.
Wash your hands thoroughly and disinfect the site. Slowly turn your piercing to remove crusts, pus, and flakes.
Keep the area dry and apply ointment. Consult a doctor if the infection worsens.
Convince Your Parents to Let You Have Another Piercing in Your Ear
- Use reasoning. Be patient and kind and help them understand specifics.
- Teach them about new piercings and take them to stores to show them how others are doing the same.
- Remind them that they allowed you to get piercings before.
- Highlight your accomplishments and ask them to reward you with a second piercing.
- Explain that the pain is not permanent and be patient.
- Show them pictures, talk about health, offer insight, and let them know about quality piercers.
- Ask them to talk to friends or other people who can convince them.
Decide Whether or Not to Get Your Ears Pierced
- Consider your age and whether you are ready.
- Remember that it will be painful, and ask yourself if you are willing to bear it and whether it will hinder your lifestyle.
- See if you have the cash required for the whole procedure.
- Talk to your doctor to see if you are allergic to anything and whether you can get your ears pierced if you are on medication or have a disease.
- Consider work/school and talk about it with family/friends.
- Decide the piercing you wish to get, when you want to do it, by whom and what jewelry you will wear once you are ready.
Enjoy Getting Your Ears Pierced
Planning and making an appointment prevents rush, worry, and fear of the unknown. Decide if you want a gun or needle piercing and what type of piercings you want to get.
Listen to the piercer’s guidelines and use a stress ball to destress if you are afraid. Pick your studs. Now sit back and close your eyes as the piercer makes a hole in your ears. Try to stay calm, and once the jewelry is in, you are good to go! Go earring shopping and find cute earrings to wear once your piercing heals.
Not Be Scared when Getting Your Ears Pierced
- Mentally prepare yourself.
- Visit the piercer at a time when there are fewer visitors around.
- Take a friend, stuffed animal, or stress ball to calm your anxiety.
- Do not tense up, breathe, and do not try to look. Keeping your eyes closed is a good idea.
- Reward yourself with a treat and go earring shopping afterward.
Read also: 16 Ideas For Short Choppy Haircuts
We Love These Flashy Ear Piercings
Ear piercings can be super fun and are a great way to amp up your look. That is if you are willing to bear the pain and care for your piercing afterward.
Not all ear piercings are alike. Remember these piercing names next time you visit a professional piercer and ask whether or not you have the correct anatomy for your favorites.
Once your piercing heals, you can keep switching jewelry to change your style or match your outfit. Sounds fun, right? Then start thinking about getting your own ears pierced today!
Adorn your ears with gold or titanium for a beautiful and high-end look.
Do you love high-end fashion? What about body art? Luxtionary has the best in fashion, style, and more.
Start here to learn all about men’s luxury tattoos.
Featured image source: Fashionweekdaily.com

